Hi, here I am talking about UWP Development. When we need to create a UWP app, the first thing comes to mind where to start? The initial point to start building a UWP application Blank App(Universal Windows) project template provided by Visual studio. With this, we have to write a lot of code from scratch for implementation of MVVM, the latest Windows 10 features and other required practices. So this becomes a cause of slow down the development speed. An explication for this situation, Template 10 was introduced. I have already talked about template 10 in my earlier post "Template 10 for UWP". By this followed link, you can visit this article and go threw what Template 10 is and how we get started with Template 10. After Template 10, the next way to start building a UWP App is Window Template Studio aka WTS.
Windows Template Studio, aka WTS, is a Visual Studio Extension developed by Microsoft. This introduces a wizard-based experience that can mold your primary essentials like Design, Structure, Frameworks, and pages into a perfect UWP project. So you can able to get simple generated project templates as a starting point, not a completed application but able to compile and run in once. WTS has the goal to make UWP development easier and time saver by using its wizard-based experience for every Universal Windows app developer.
It is always good to use a standard template instead of a Blank App Template. The reason for this, with the Blank App template it is required to write a good line of code to gain some general components like Project Structure, Design, Frameworks, Menus, Navigation Hierarchies, and many more things. Hereof, standard templates are used to make this job easier to have a start point without writing Lots of code for any LOB application by including required components and services. Now we have some idea as to why we are going to use a standard project template, not the Blank App template. Now the question is which one suits my UWP project.
Windows Template Studio vs Template
I have developed UWP apps using both of stuff WTS and Template 10. Template10 is a perfect framework for building UWP apps. A Template 10 project has all defined things to meet the essentials of building a UWP App for every Universal Windows app developer. Although the Windows template studio helps developers get started building UWP apps much faster. If you are new to this platform, it will help get a good project structure and help you follow some recommended practices.
Where to Start?
Step 1:- Open Visual Studio 2019 on your computer.
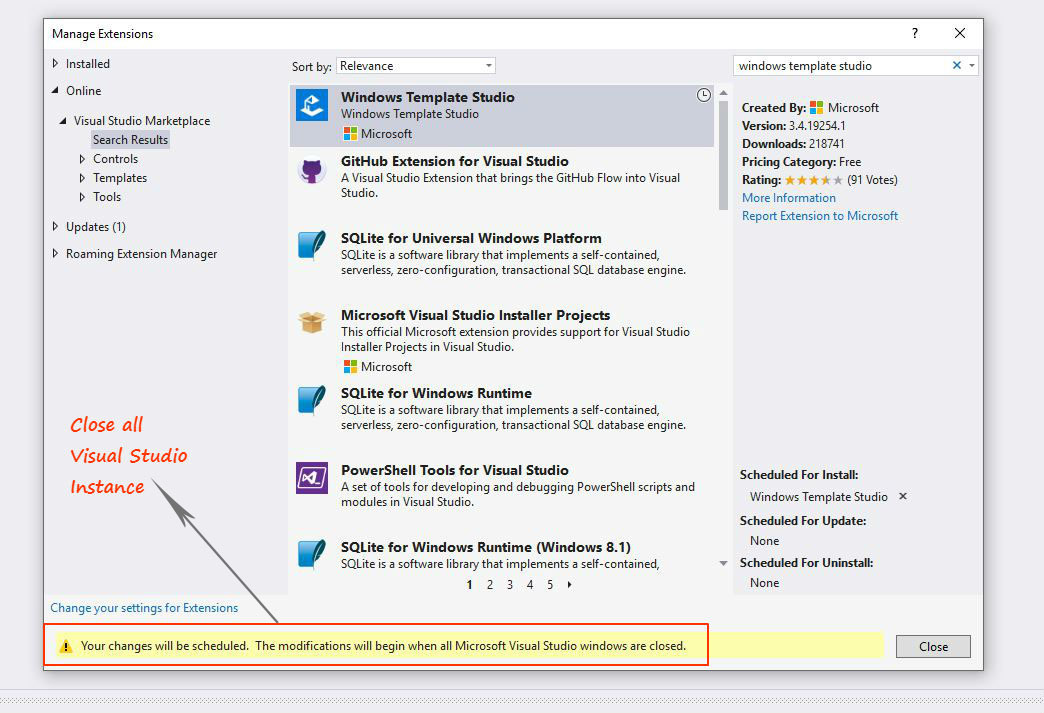
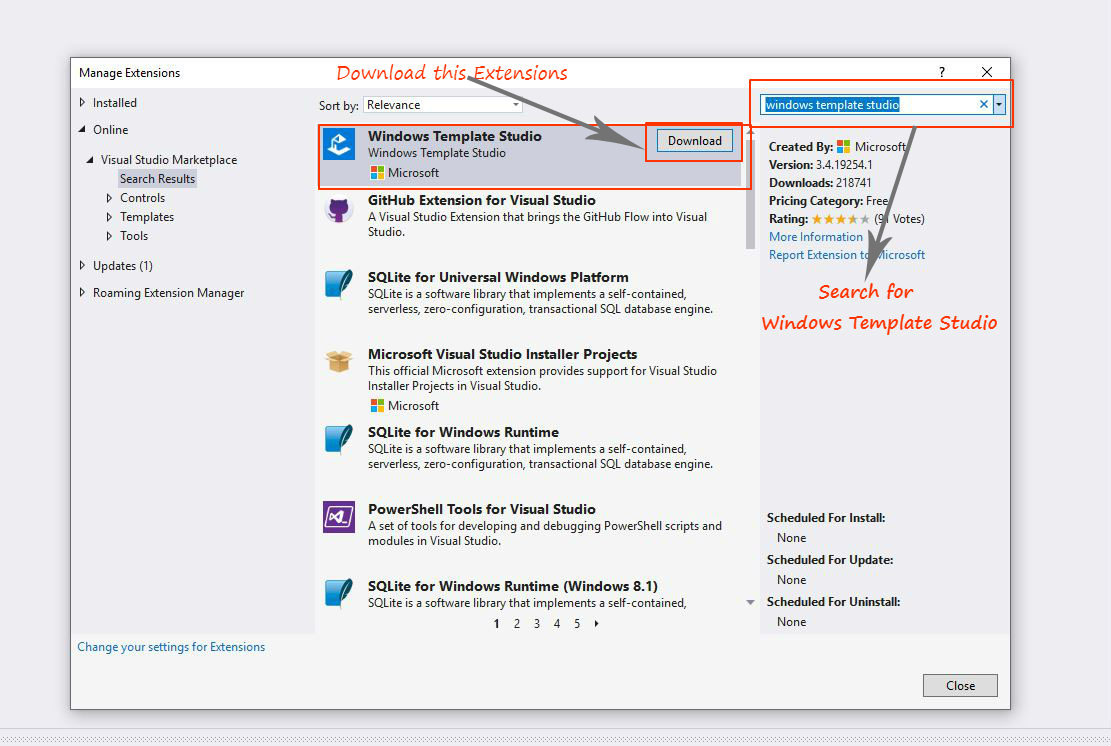
Step 2:- Click at Manage Extensions under Extensions Menu.
Step 3:- Search for "Window Template Studio" in Manage Extensions window, Then download the extension named as Window Template Studio.
Step 4:- Now It will ask you to close your all visual studio instance, go for it. Hit at the close button and close your Visual Studio instance.
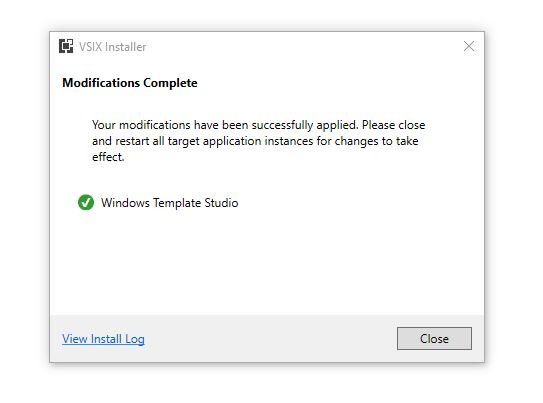
Step 5:- After step 4, It will start installing Window Template Studio extension. After this installation completion, Hit at the close button and open a new instance of your visual studio.
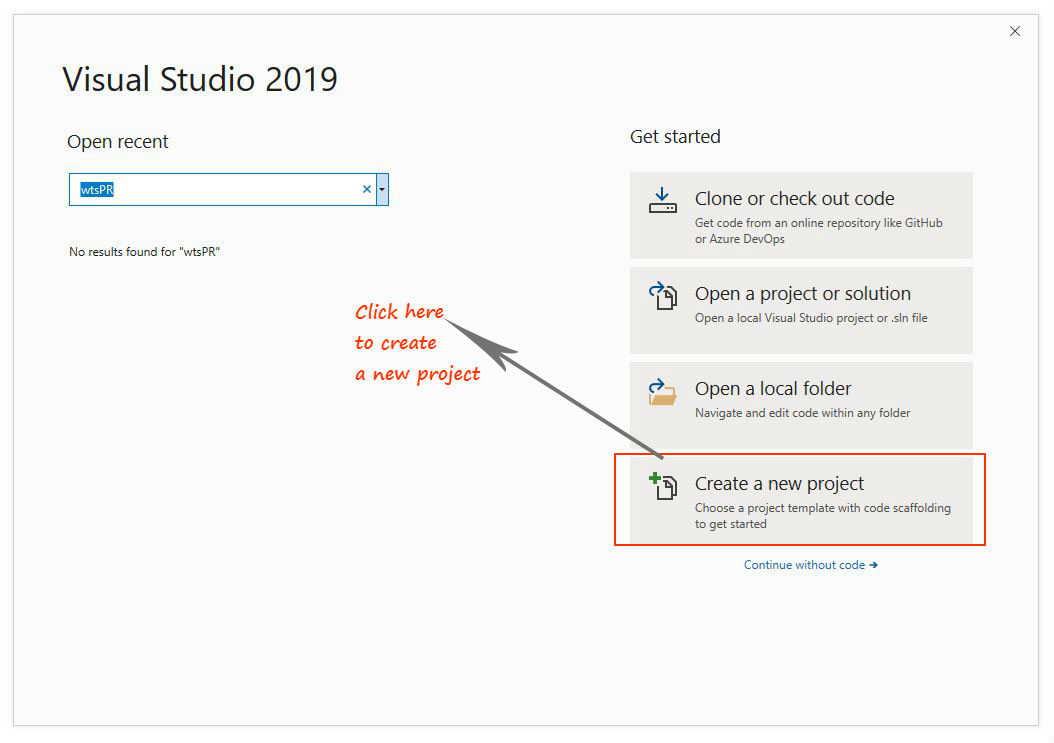
Step 6:- Now click at "Create a new Project" area in Visual Studio 2019.
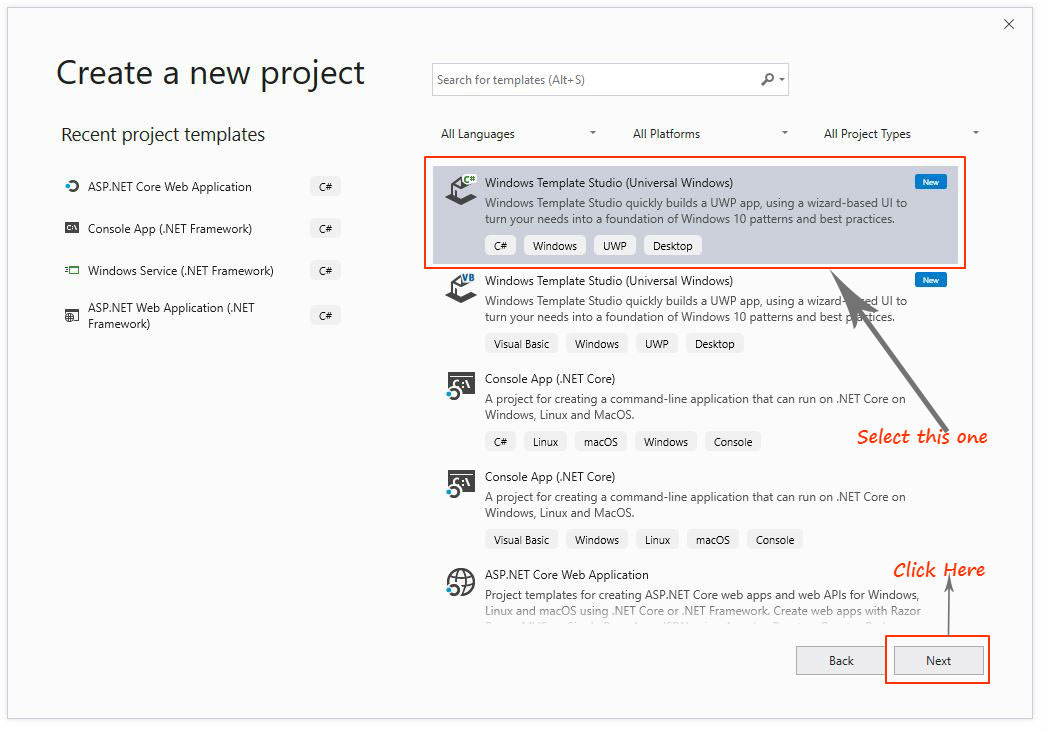
Step 7:- Here is a new window appears, You can find or search for "Window Template Studio (universal Windows)" here. After selection, hit at Next Button.
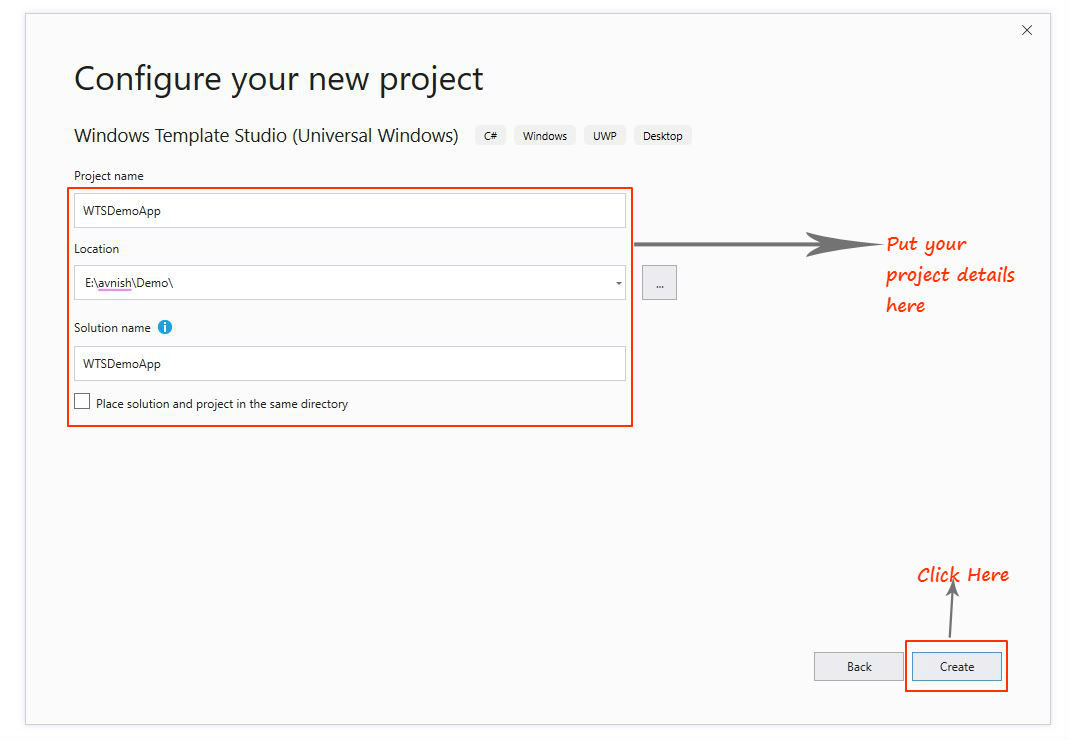
Step 8:- In the next window, put your project name, location, and related information. Then hit at Create Button.
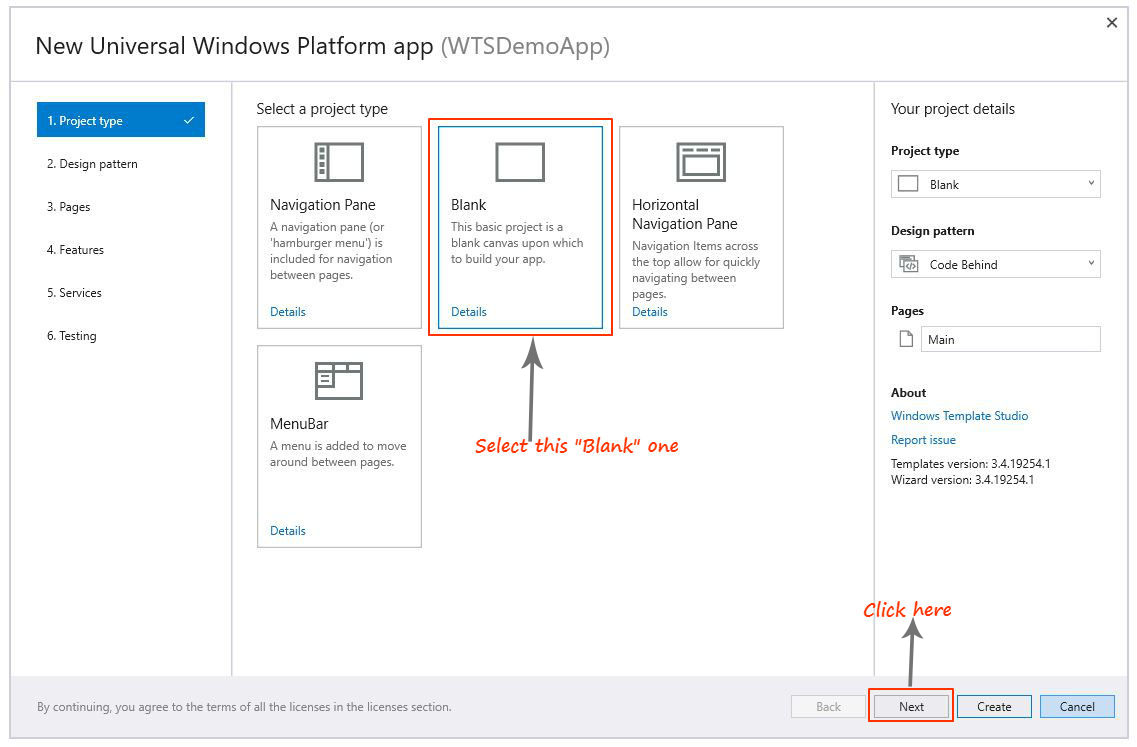
Step 9:- So here the Window Template Studio's wizard UI shows, Now you have to select your project type as per your project demand. Here I am going to select the Blank project type and click next.
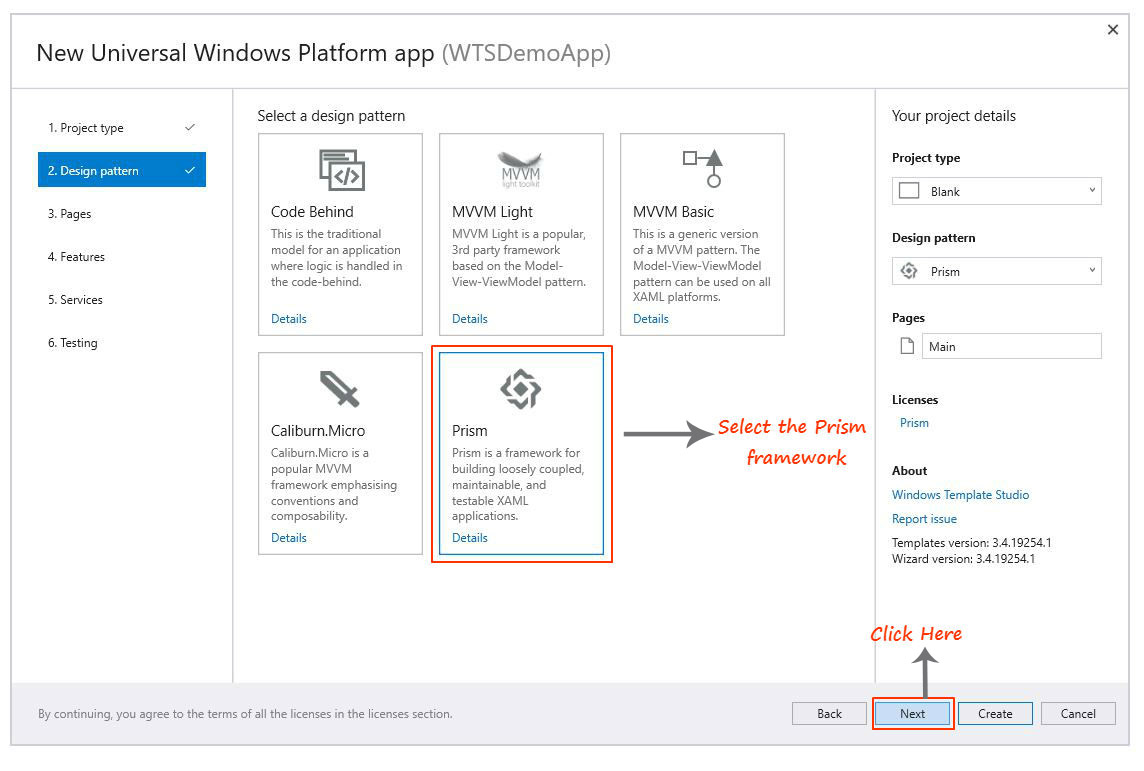
Step 10:- Now it is time to select the design pattern, here you can select multiple types of design patterns for your project in this wizard window. Here I am going to select the Prism and click next.
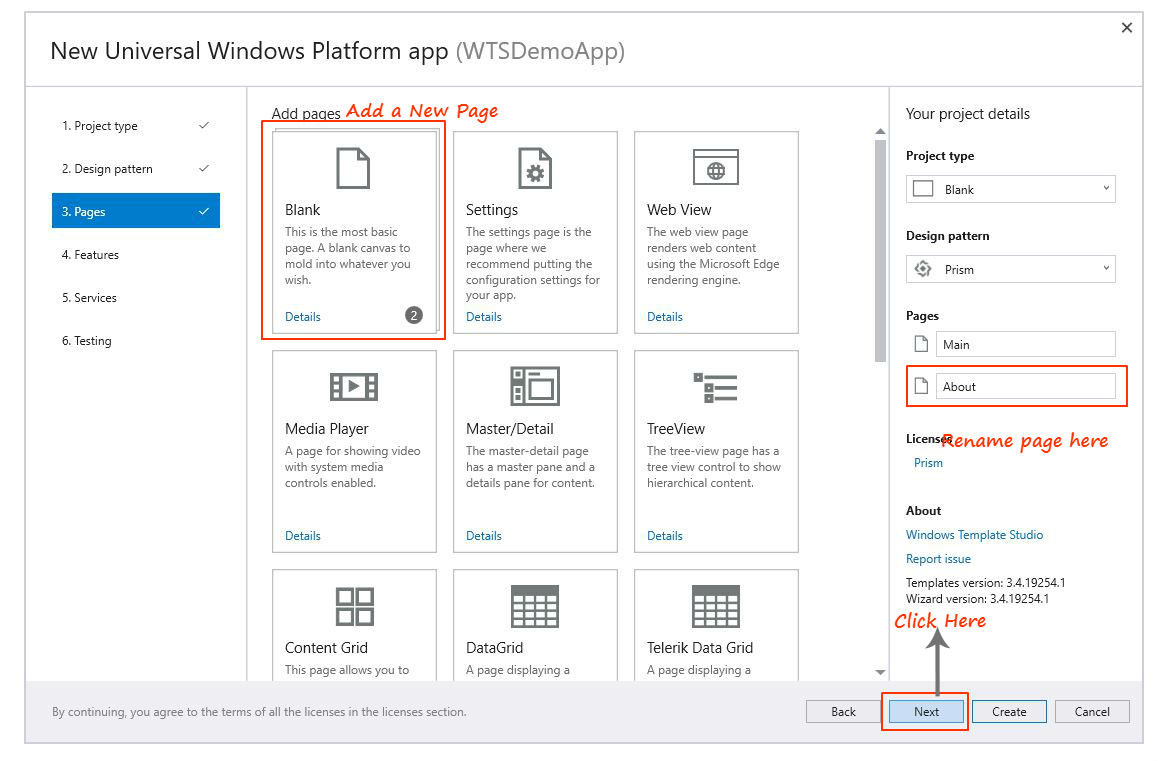
Step 11:- In the next window, you can able to add various types of pages as per our needs of the project. Here I am going to add a blank page and click at next.
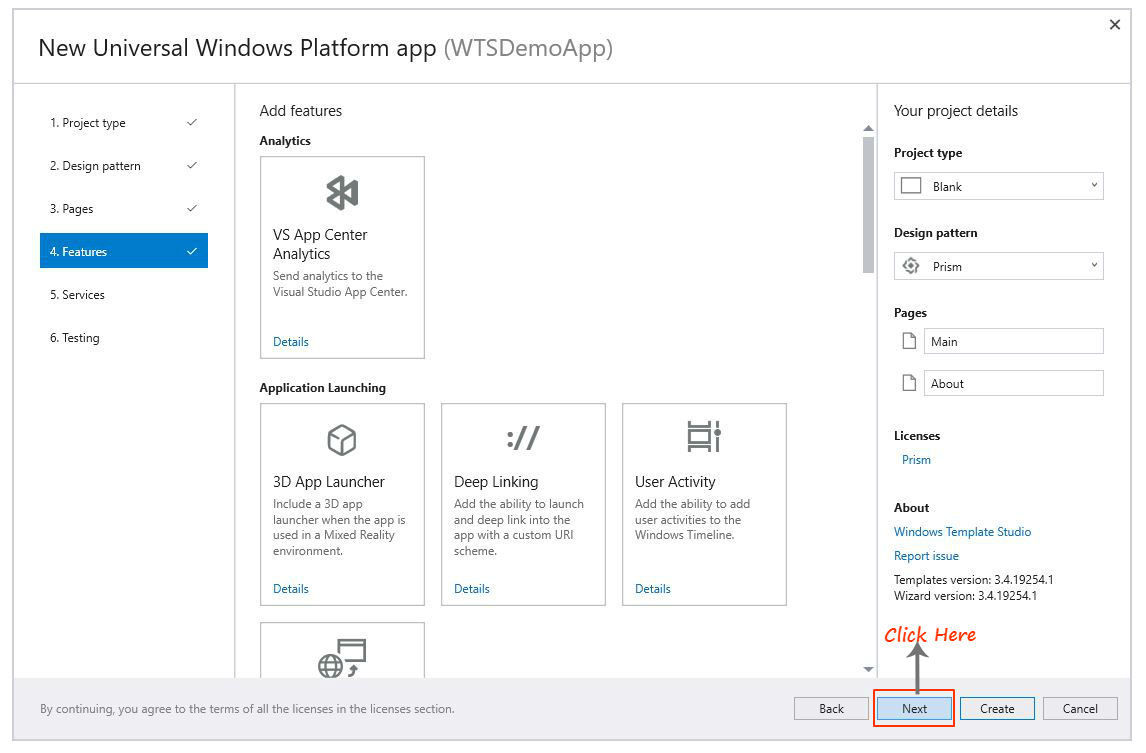
 Step 12:- In the next wizard's window, you can see there are several app features available for the project. Here I am not select any one of the features in my project. Because of this project, I don't need any such features right now. Now it is time to hit at Next button.
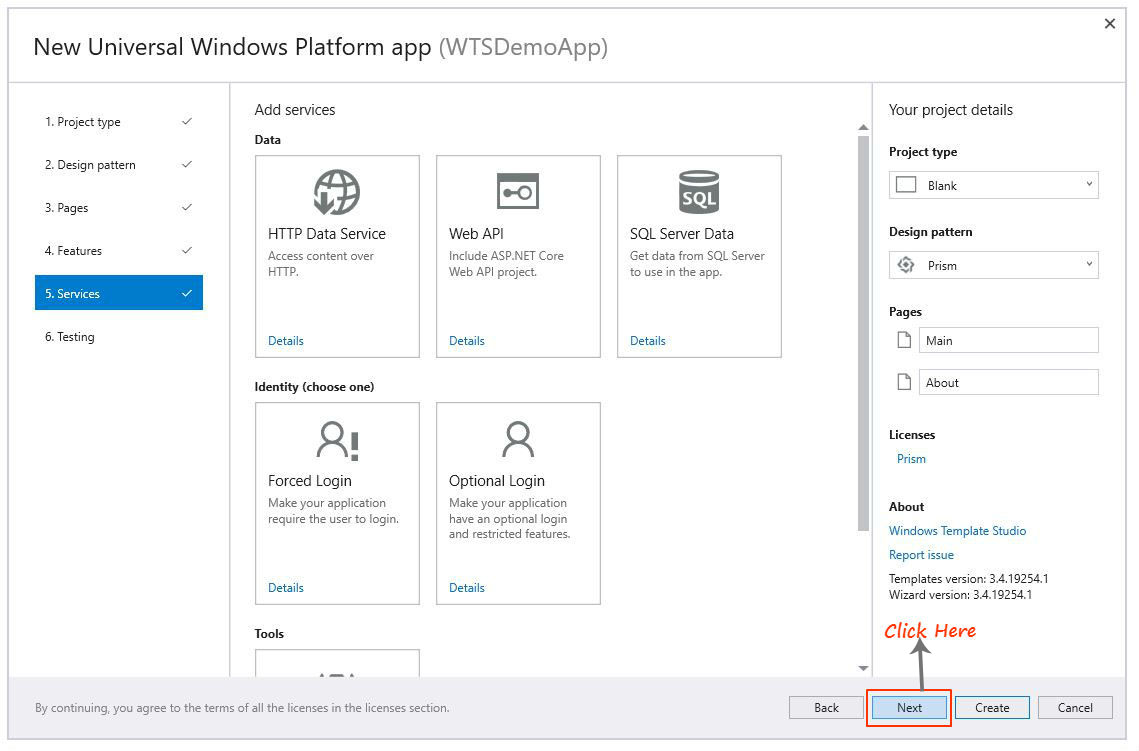
 Step 13:- In the next wizard's window, you can see there are several app services available for the project. Here I am not selecting any one of them for my project. The reason for the same, I do not need any such services in this project right now. Here you can add them if needed. Now it is time to hit at Next button in the wizard window.
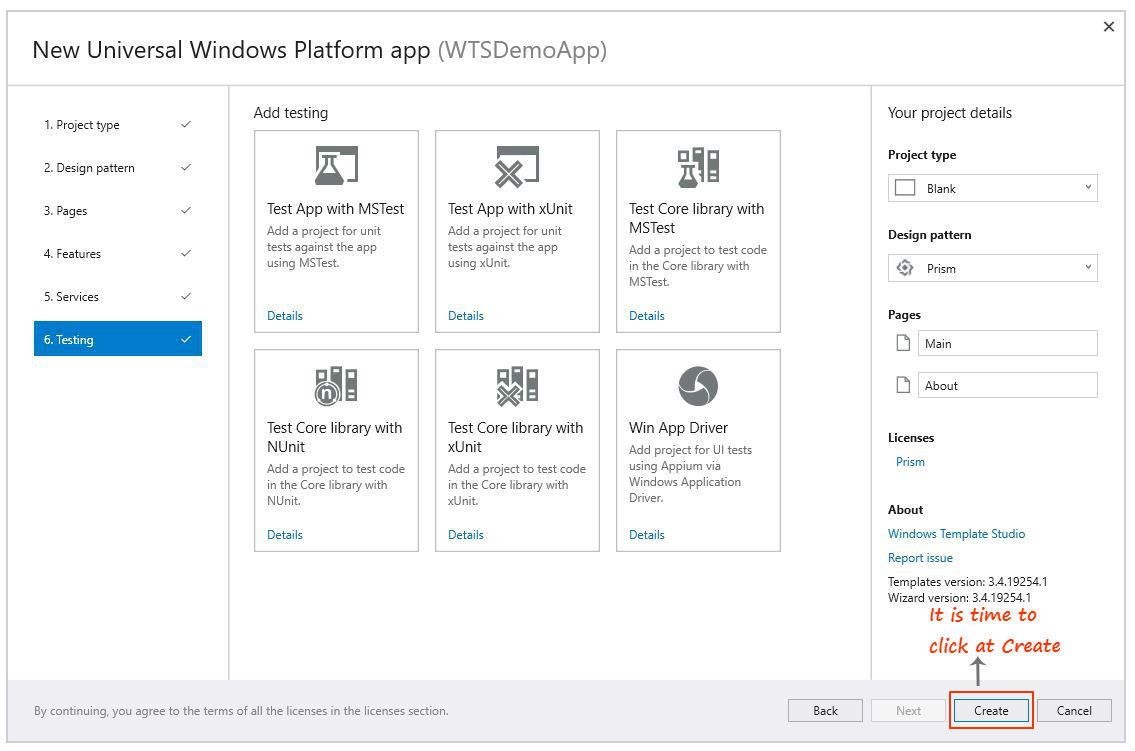
Step 14:- In the next wizard's Testing window, I am doing the same as the previous step. Not select any of them, you can add them if needed. Now it is time to hit at Create button.
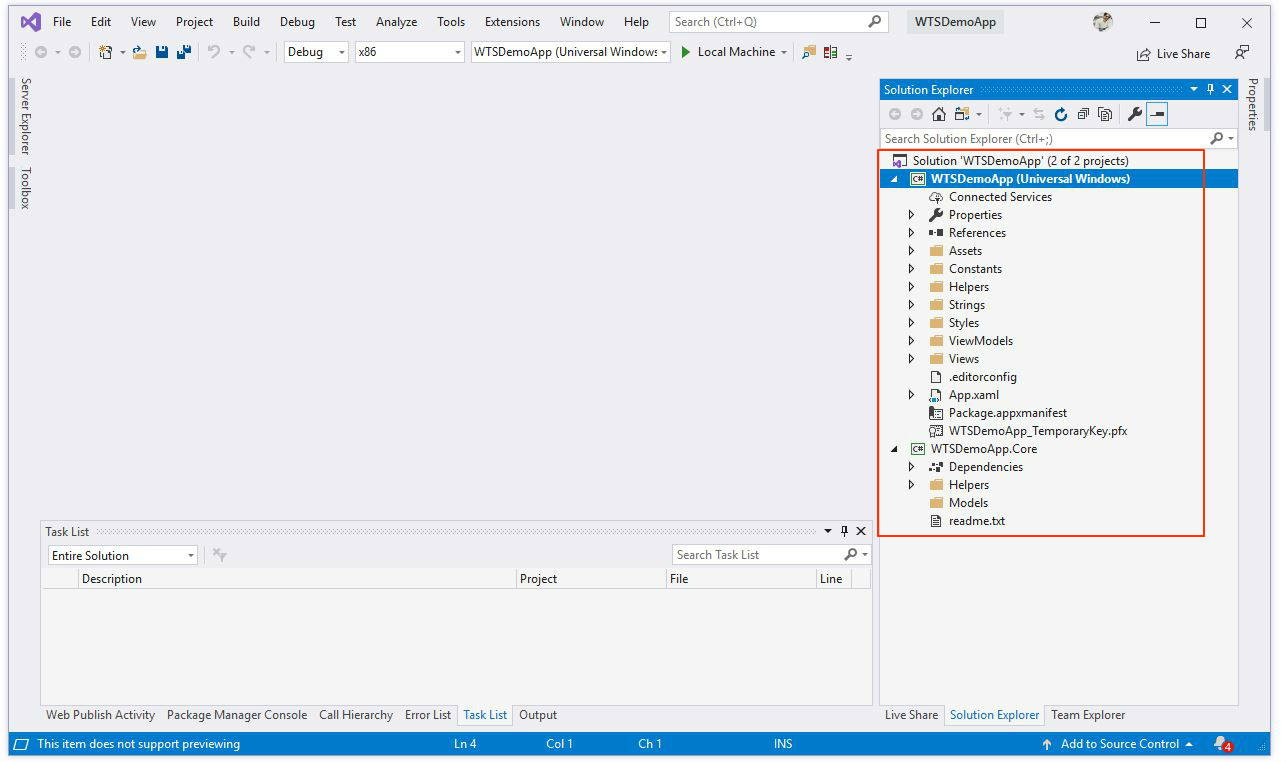
Step 15:- After that, this project loads and you can see in the solution explorer of your visual studio the loaded project has a proper project structure. It has a Prism framework installed and has a good folder structure that makes you easy to put your file and component accordingly.
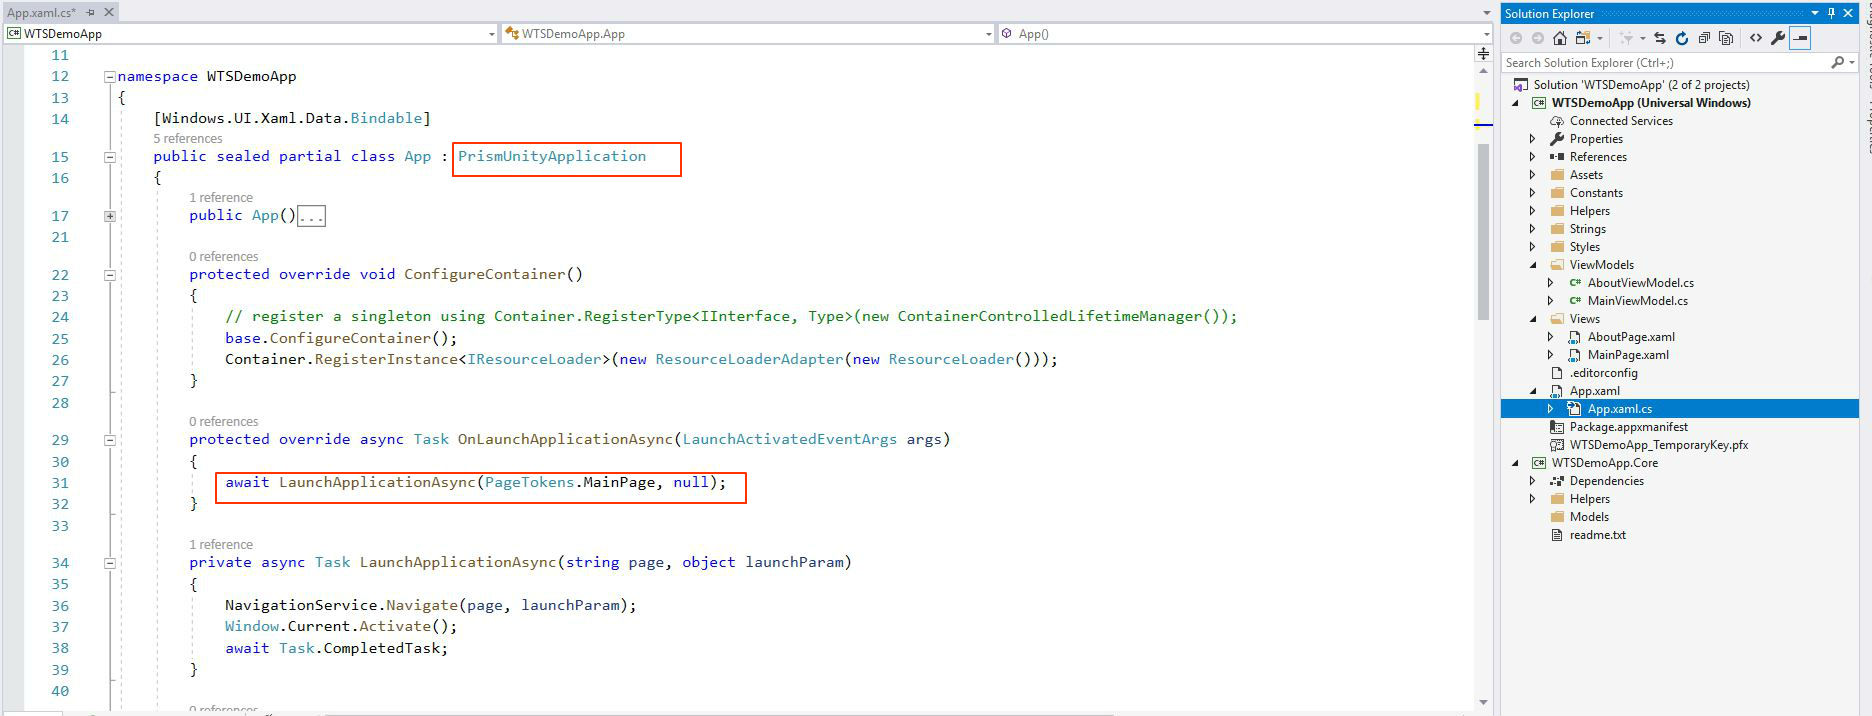
Step 16:-In this image of "App.xaml.cs" file, You can see that the "PrismUnityApplication" class serves as a base class for the App class because we have selected the PRISM framework as a project design pattern. The "PrismUnityApplication" class contains all required virtual and override methods that are provided by the PRISM Framework.
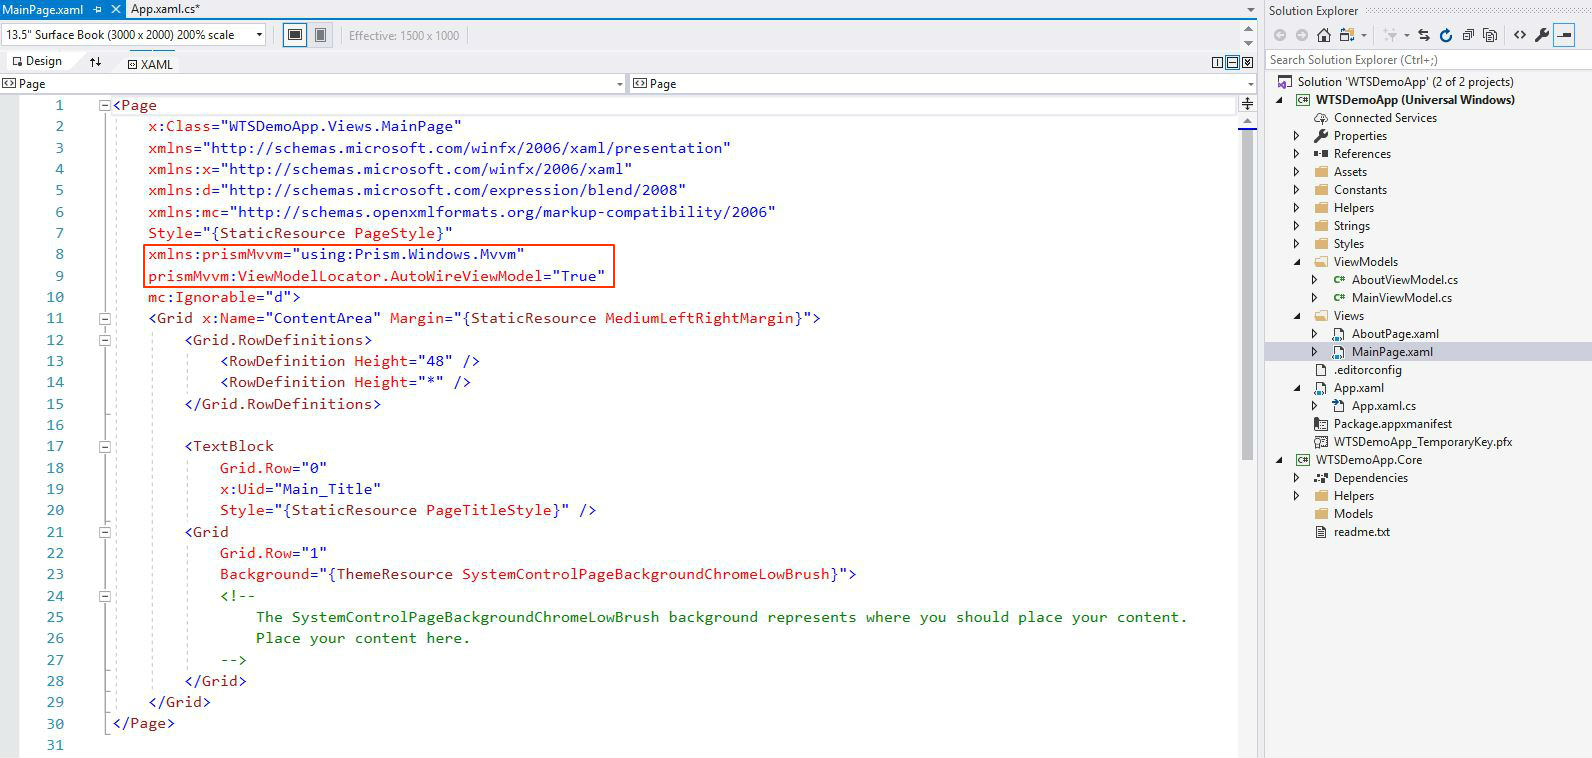
 Step 17:- In this image of the "MainPage" XAML file, Here you can put your XAML code for UI stuff. One thing to notice on this page that it use PRISM's ViewModelLocator feature which enables you to Auto wire a ViewModel.
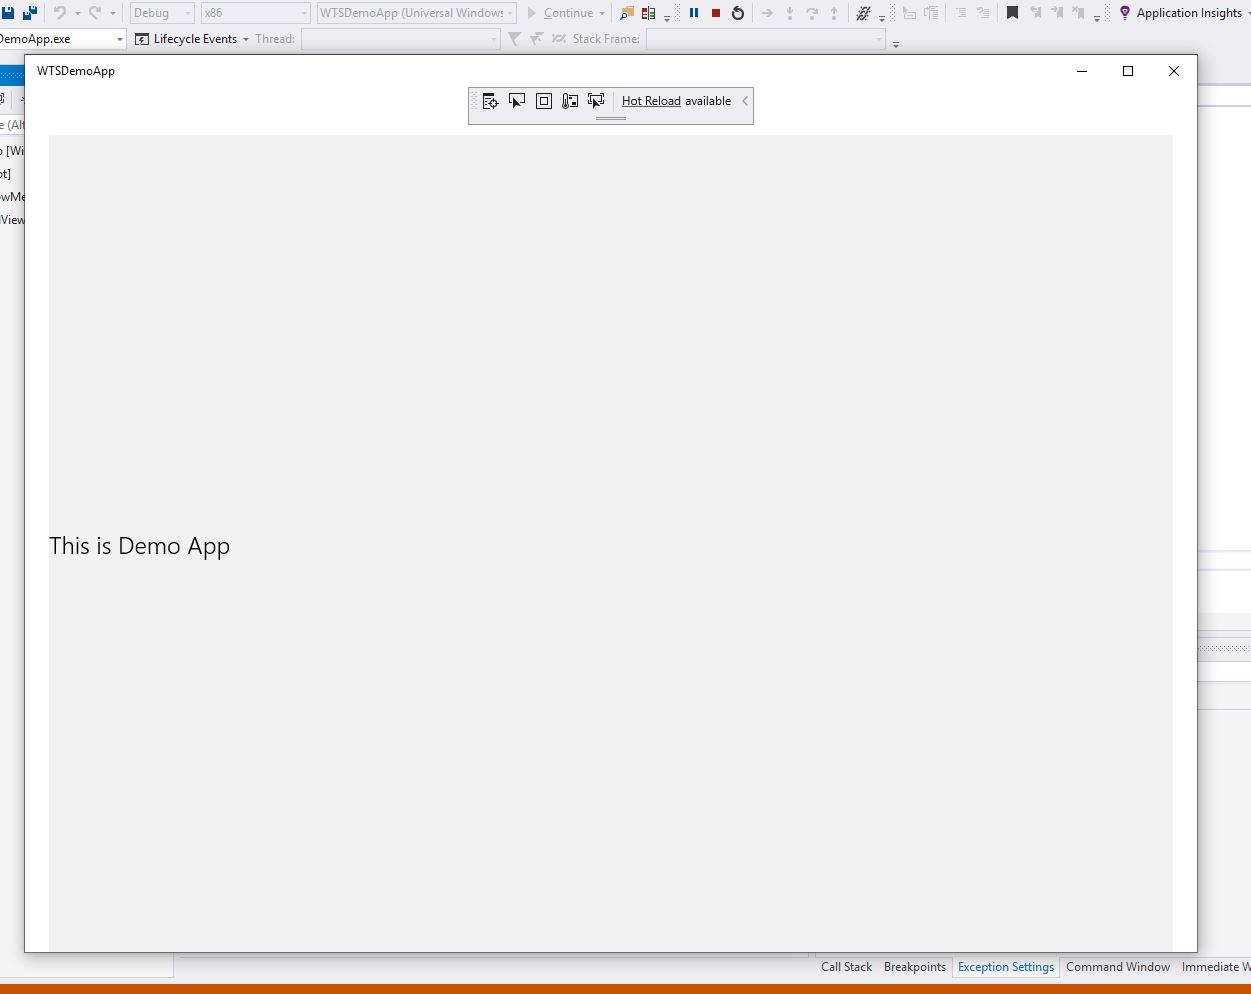
Step 18:- Now build and Run UWP App and get the result.
Wrapping up
In this post we’ve learned how to we can start building a UWP app with Window template studio. In the future post, I will try to do more with Window template studio. If you like this article feel free to share it with your friends.
;