
Hello, here I come with this article "How to Create WCF service and host in Windows Service". In this I have tried to visualize every step for creating and hosting a WCF service. Before starting have a look up at about WCF Services and Windows Service.
"A Windows service is a computer program that operates in the background."
"Windows Communication Foundation (WCF) is a framework for building service-oriented applications. With WCF, we can send data as messages from one service endpoint to another. An endpoint can be a client of a service that requests data from a service endpoint."
Let's have a fresh start.
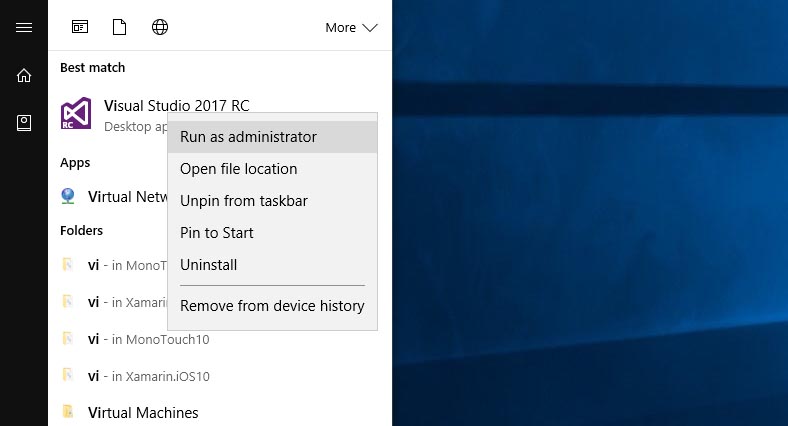
Step 1: start your Visual Studio as Administrator
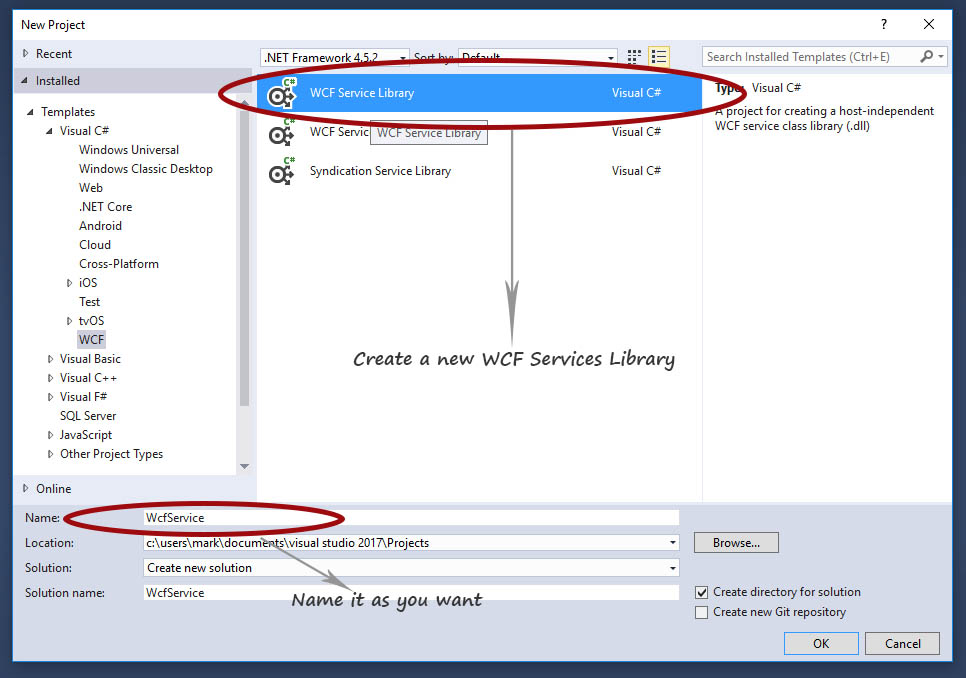
Step 2: Create a New WCF Service Library and name it as you want. Here, we name it as "WcfService".
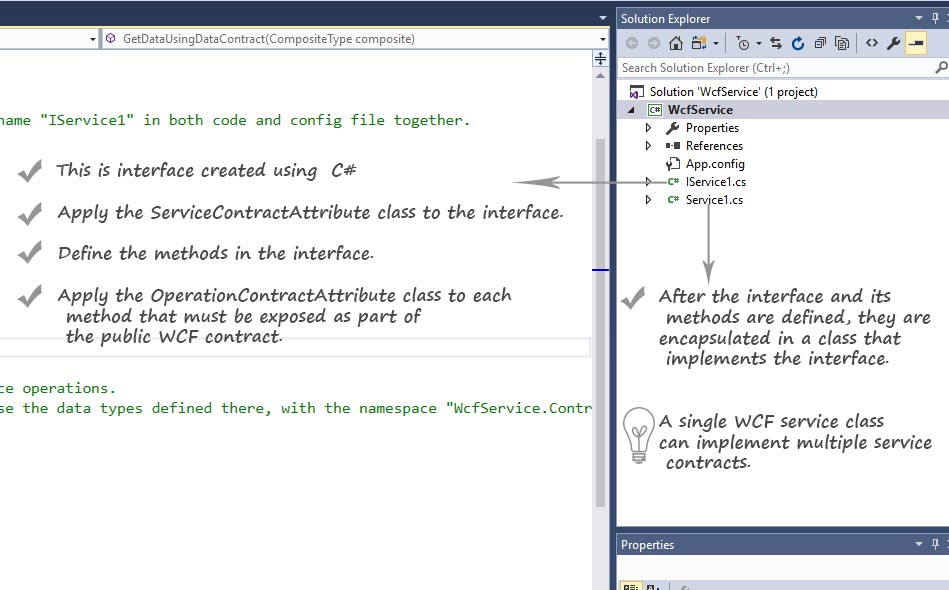
Step 3: Now you can see the Solution Explorer fill with a WCF Service Library Project (WcfService project) .
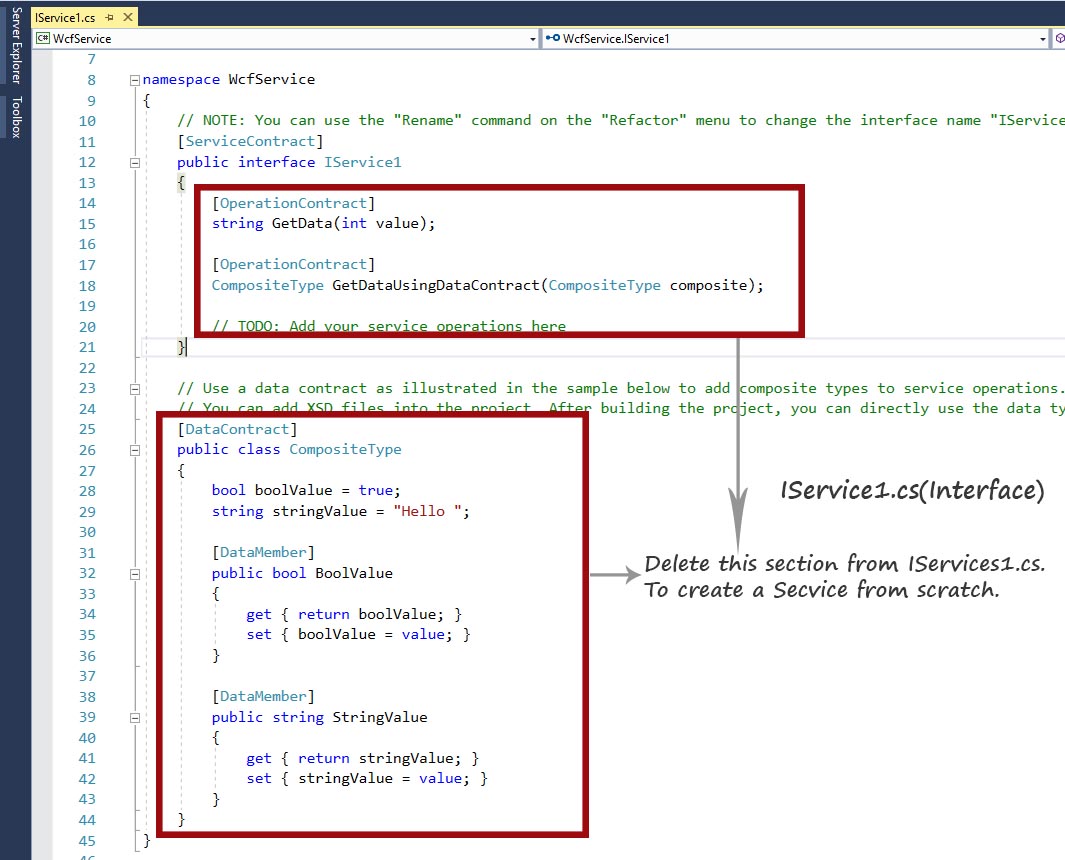
Step 4: In your project, you find such code in your IService1.cs page. Delete the red section of your WCF Service Library Project(WcfService project) highlighted in below image.
Step 5: Add OperationContract method in ServiceContract of IService1.cs, This Service Contract are basically describing the operations exposes to another party or its clients. Here, I declare a method int Sum(int x, int y ) in interface as OperationContract.
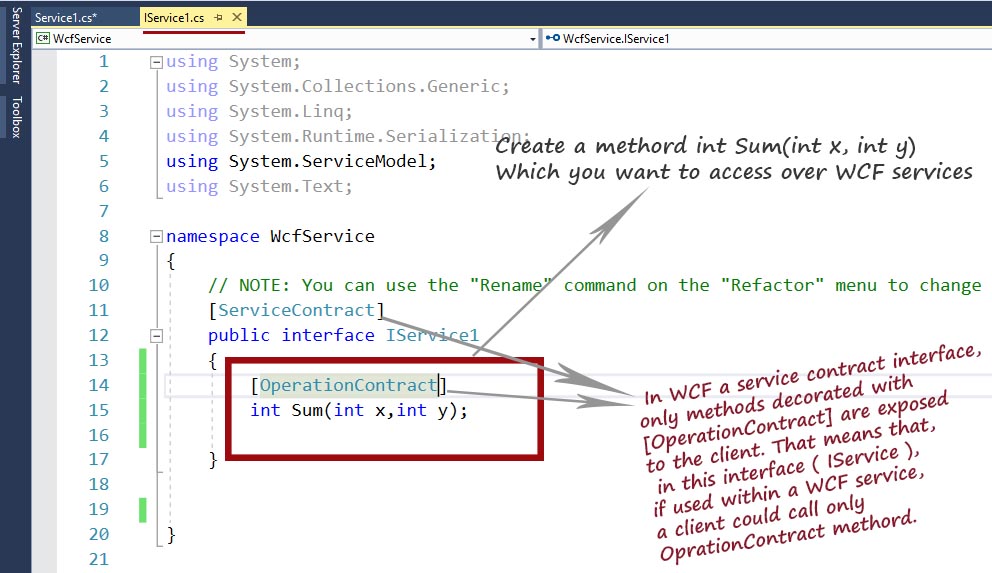
 [ServiceContract]
    public interface IService1
    {
        [OperationContract]
        int Sum(int x,int y);

    }
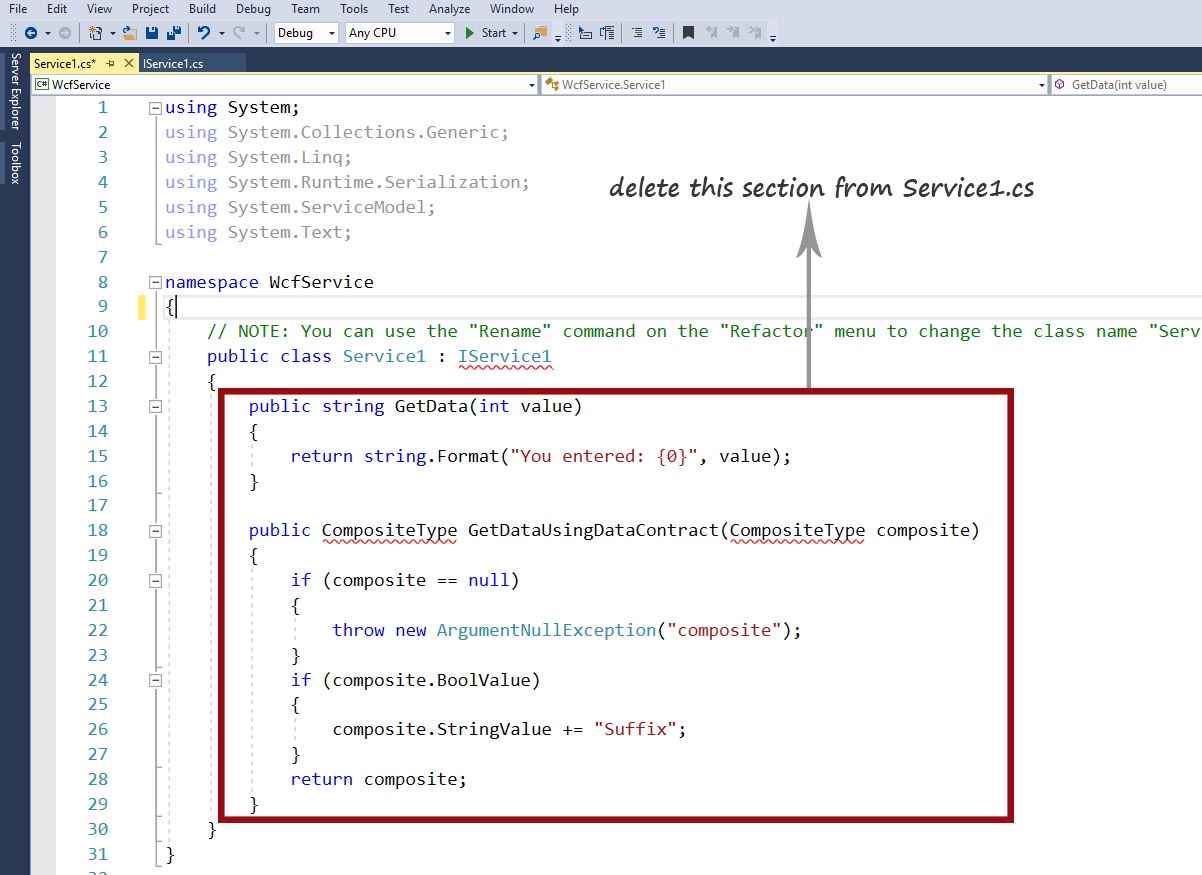
Step 6: In your project, you find such code in your Service1.cs page. Delete the red section of your WCF Service Library Project(WcfService project) highlighted in below image.
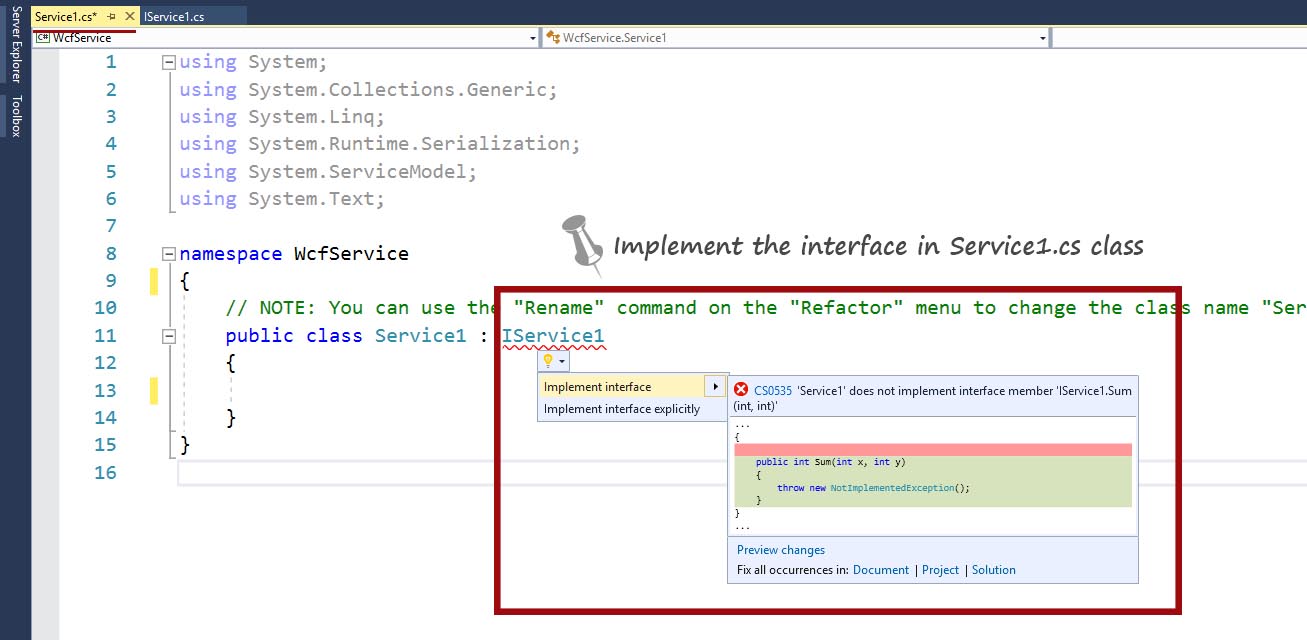
Step 7: Implement the IService1.cs Interface in your Service1.cs class of your WCF Service Library Project( WcfService project).
Step 8: After implementation, there finds a method in Service1 class as int Sum(int x, int y ) {}
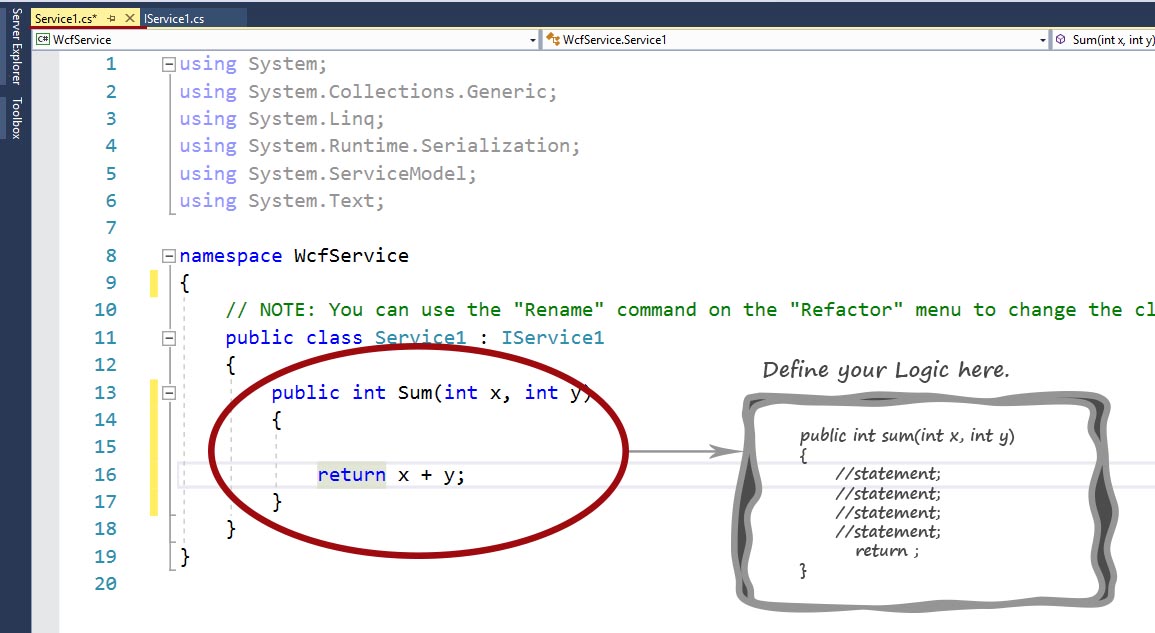
  public int Sum(int x, int y)
        {

            return x + y;
        }
Step 9: Now, Modify your App.config as per the image below. Here I have used netTcpbinding for endpoint. You can use the other alternative as an endpoint binding.
Note: your baseAddress or service address may change as per you endpoint binding.
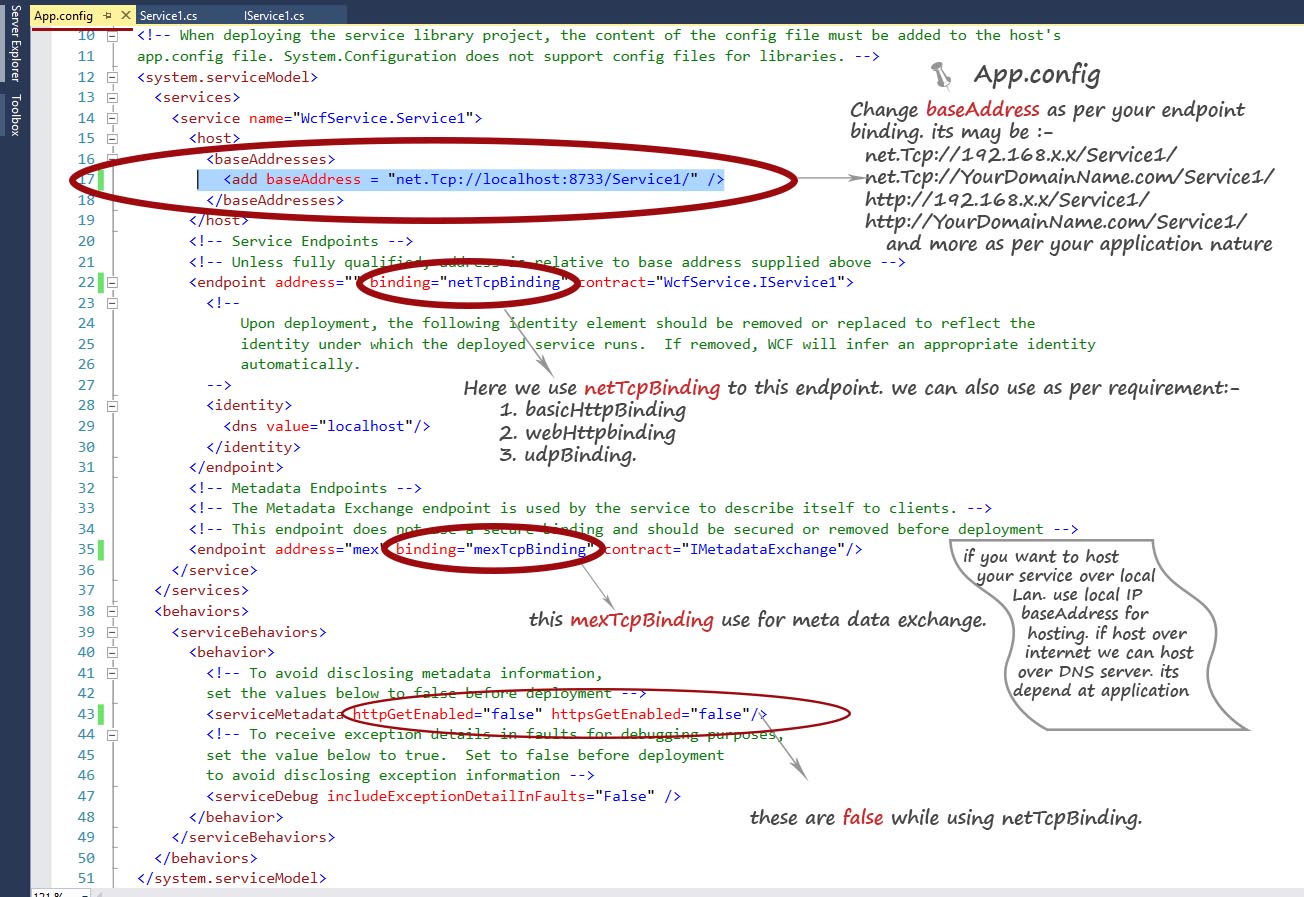
Code is here =>
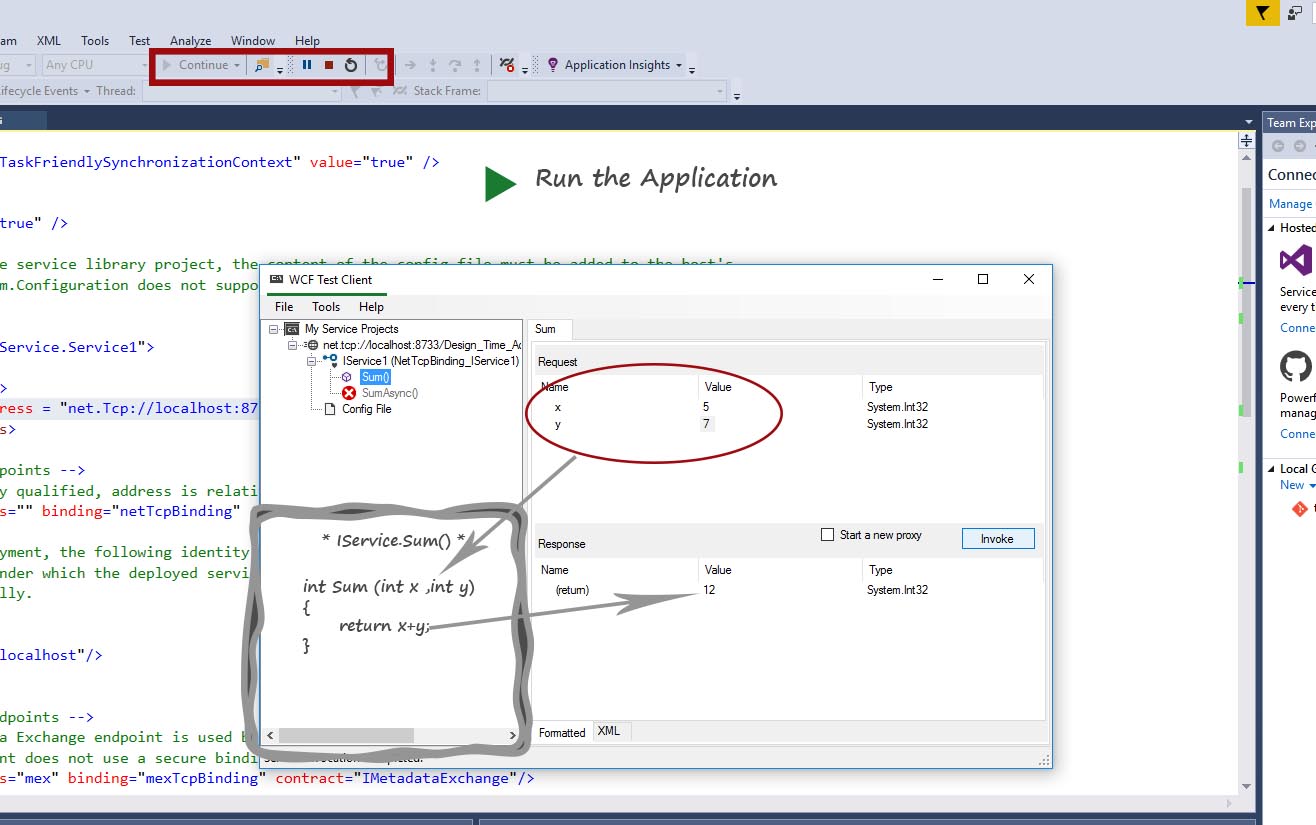
Step 10: Run your application. A WCF Test Client Appears on windows screen and click your OperationContract. For testing, insert your value and click invoke button in Request tab . You got your result in Response tab.
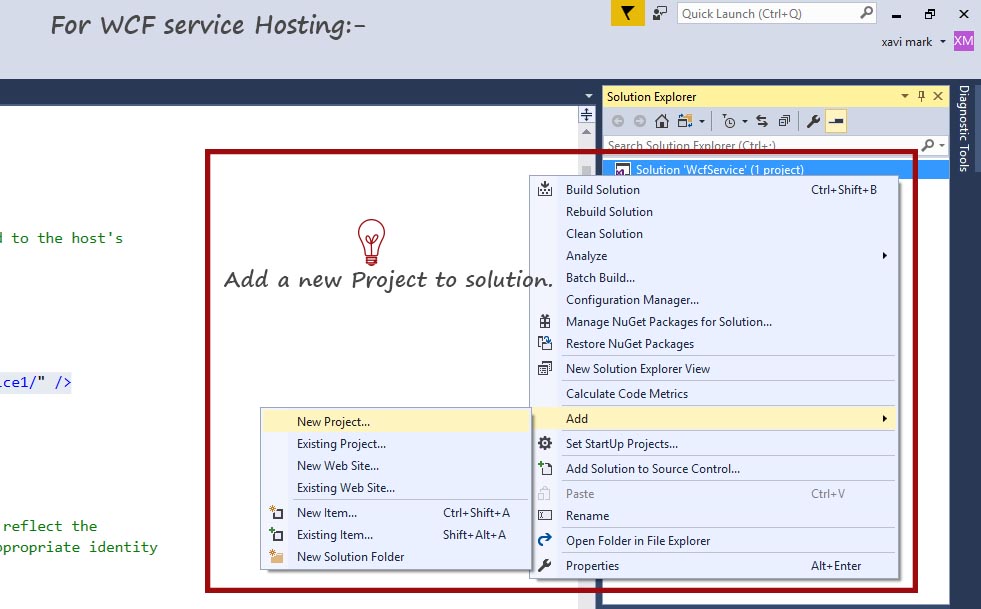
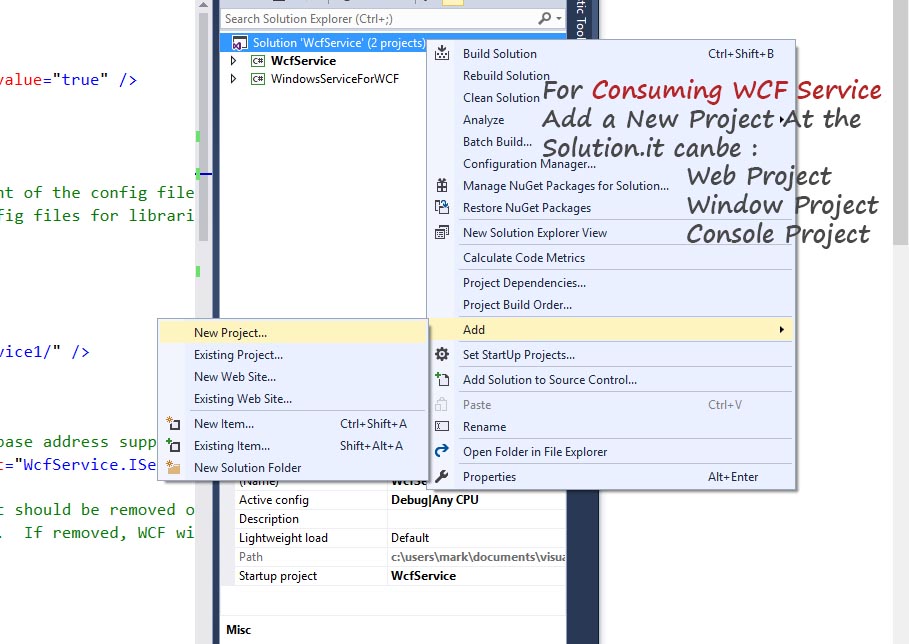
Step 11: For WCF Service hosting, We need to add a new project in the current solution.
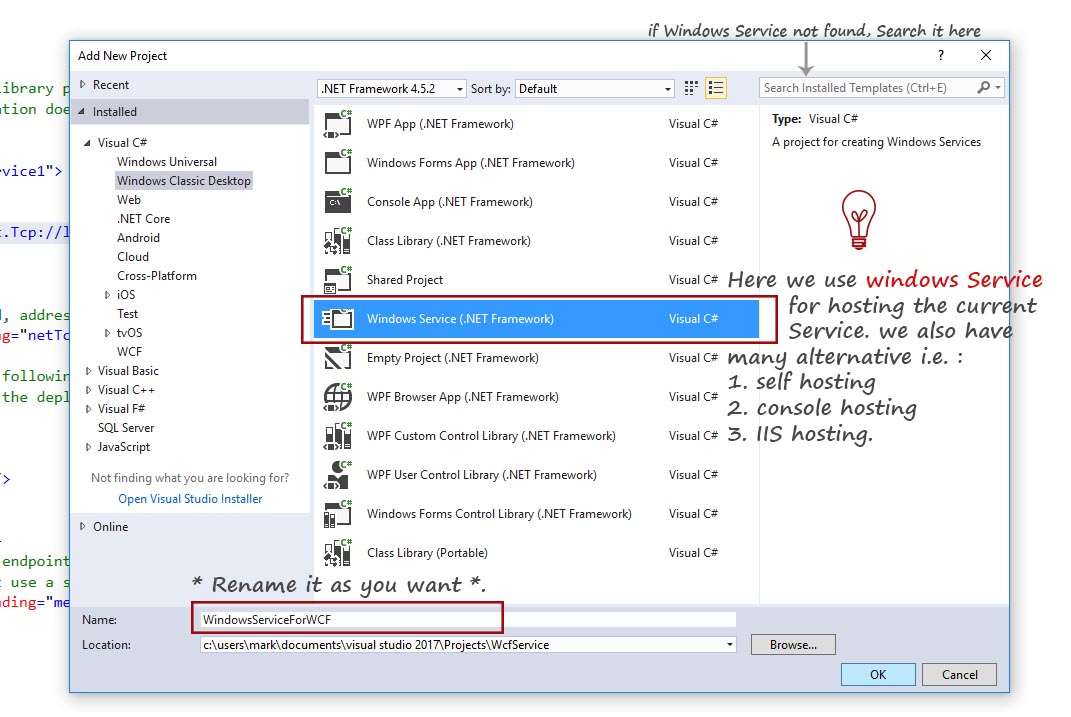
Step 12: Add a New Windows Service and name it as you want. Here, I have named it as WindowsServiceForWCF.
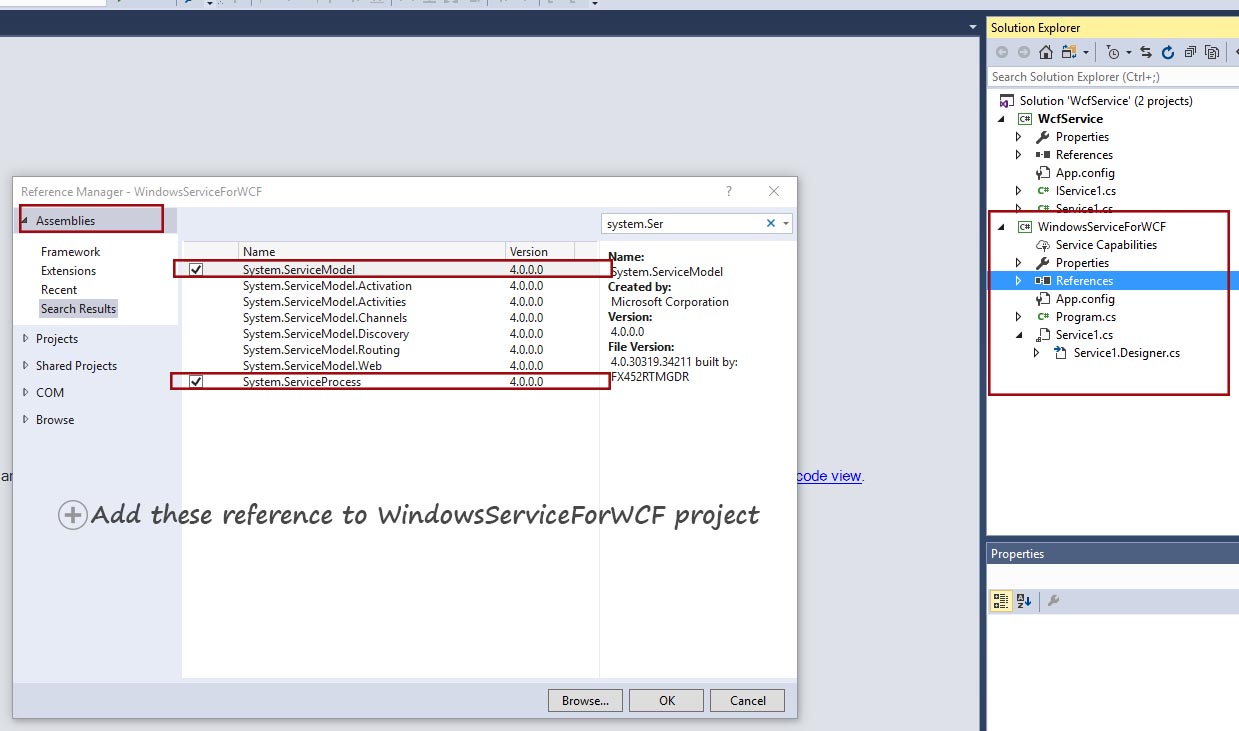
Step 13: Add Reference by right click on Reference in Windows Service project, then find and check System.ServiceModel and System.ServiceProcess. Press OK button to add these reference in your project.
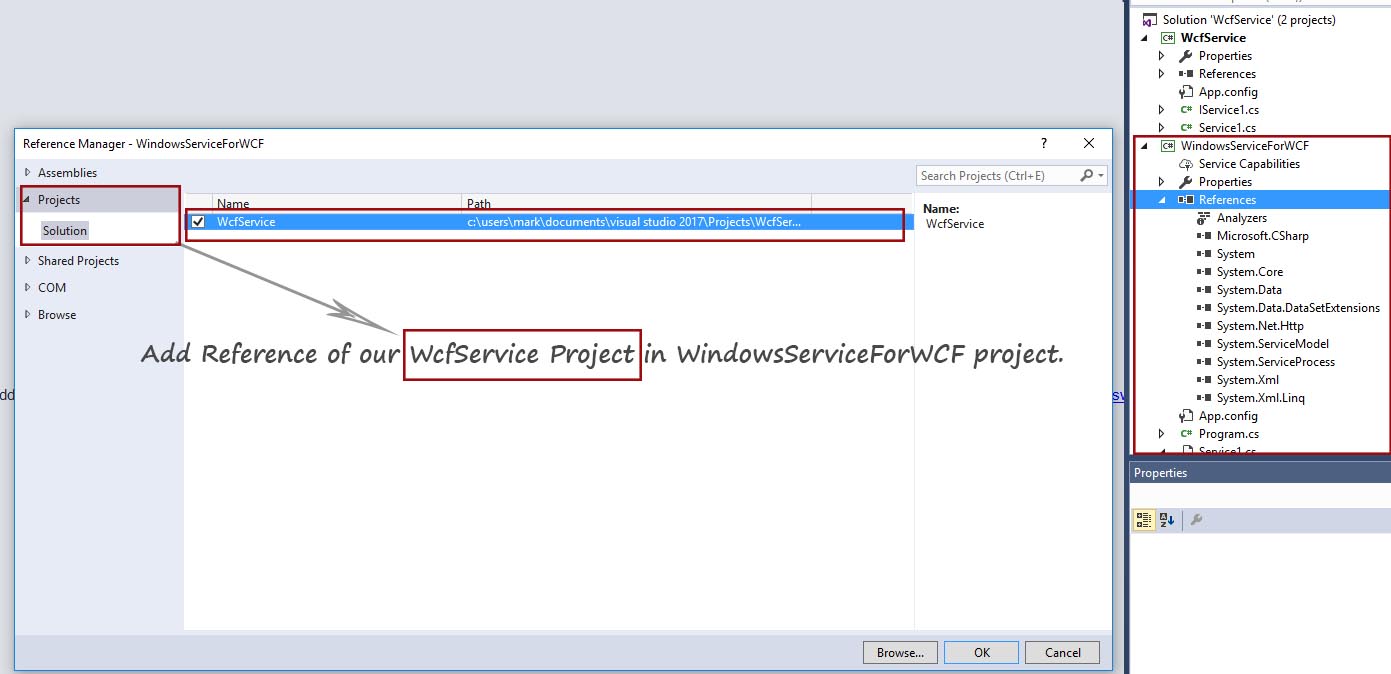
Step 14: Add another Reference of our WCF Service Library Project( WcfService project) from the Project tab by right click on Reference in Windows Service project(WindowsServiceForWCF project). Press OK button to add this reference in your project.
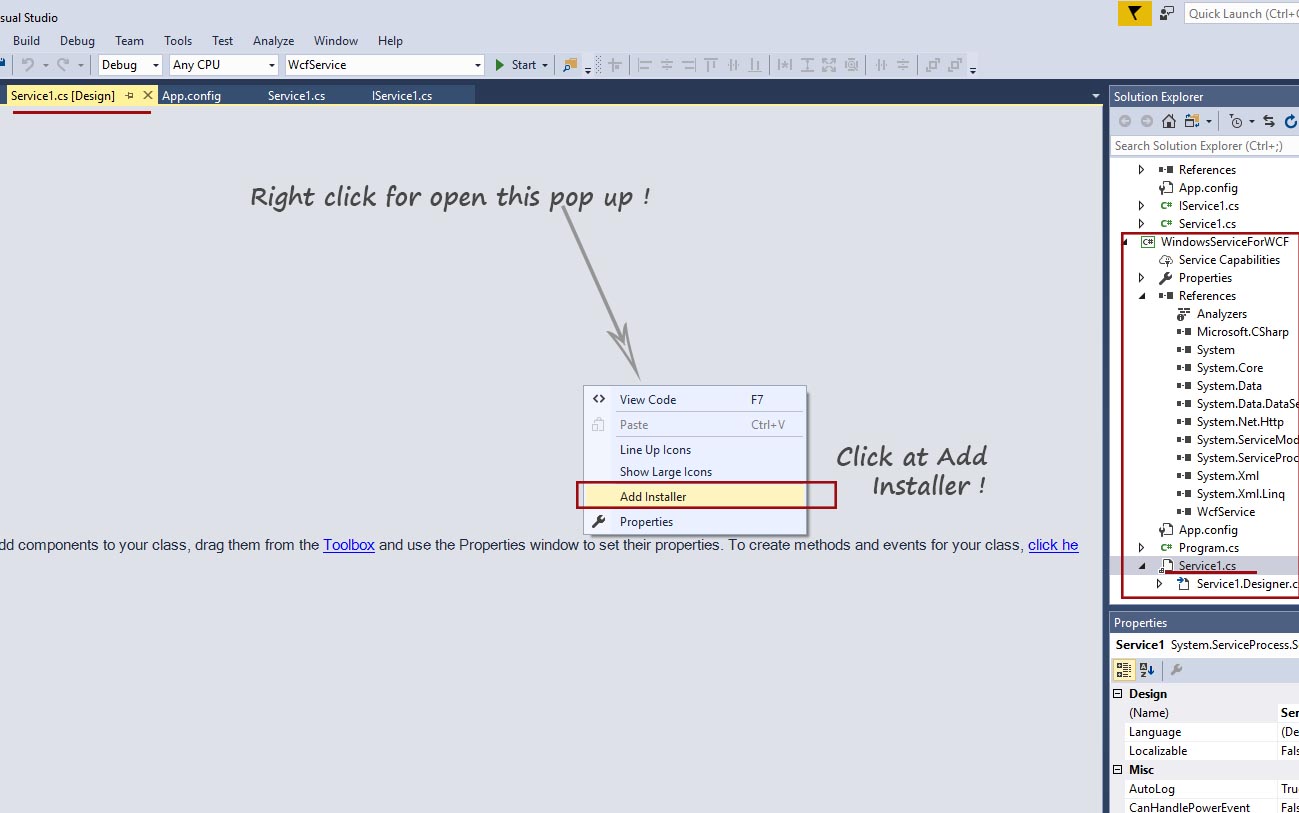
Step 15: Open Service1.cs class file from Windows Service project(WindowsServiceForWCF project). Now, Right click over Service1.cs class page and click at Add Installer.
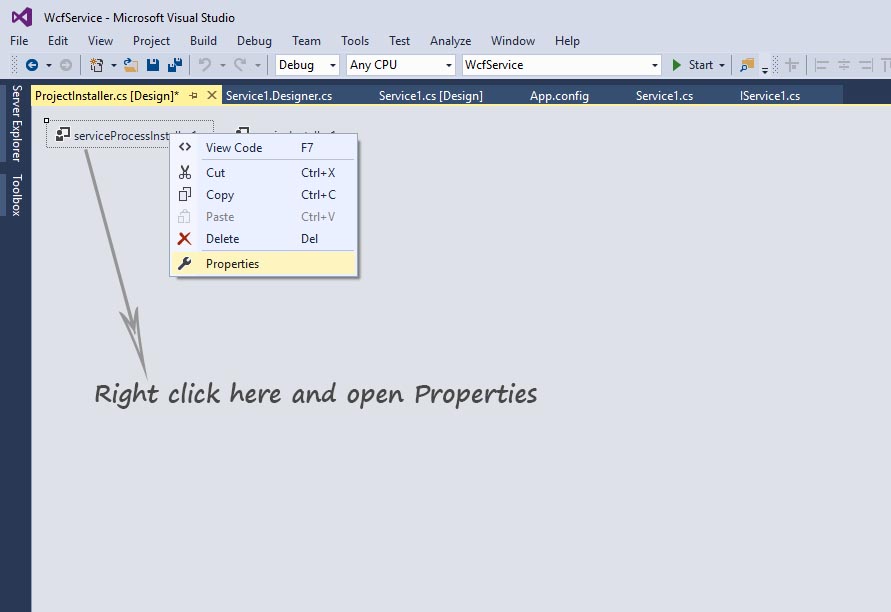
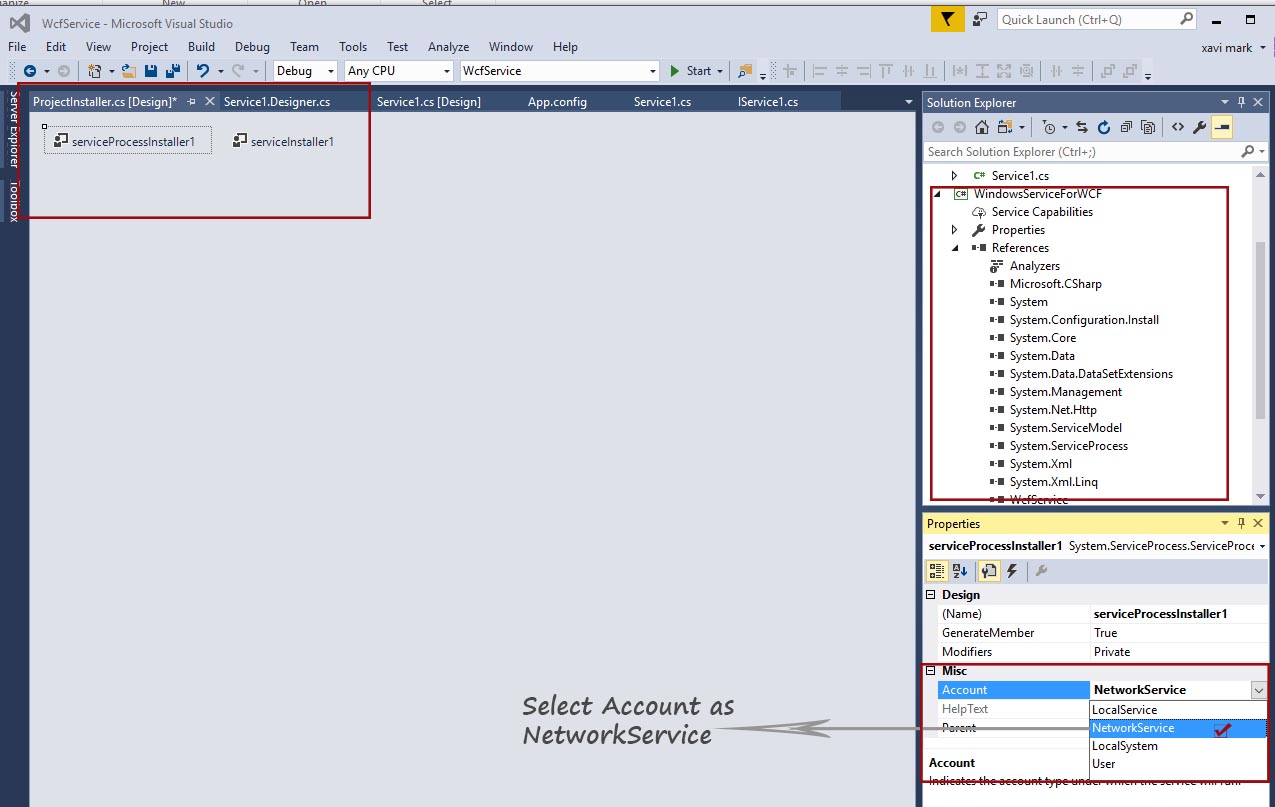
Step 16: After click on Add Installer, we find there add an another file name as ProjectInstaller.cs in Windows Service project(WindowsServiceForWCF project). It have 2 components serviceProcessInstaller1 and serviceInstaller1. Now right click at serviceProcessInstaller1 and select properties
Step 17: Go to the properties of serviceProcessInstaller1 in the right pane and edit the Account as NetworkService
Step 18: Now, go to the properties of serviceInstaller1 in the right pane and edit the StartType as Automatic.

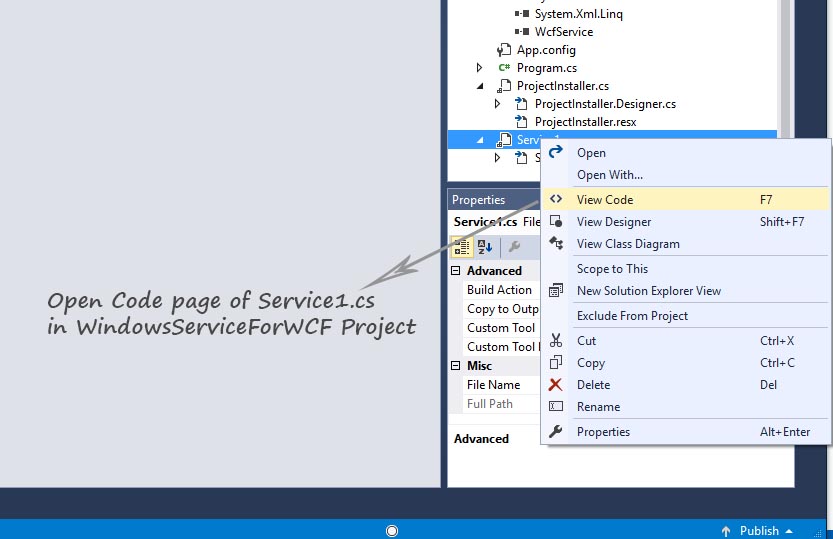
Step 19: Now, Right click on Service1.cs and open its code window.
Step 20: Now, Add the following code in your project for hosting the WCF service. By using Service Host Class, we are going to host our WCF Service Library Project(WcfService project).
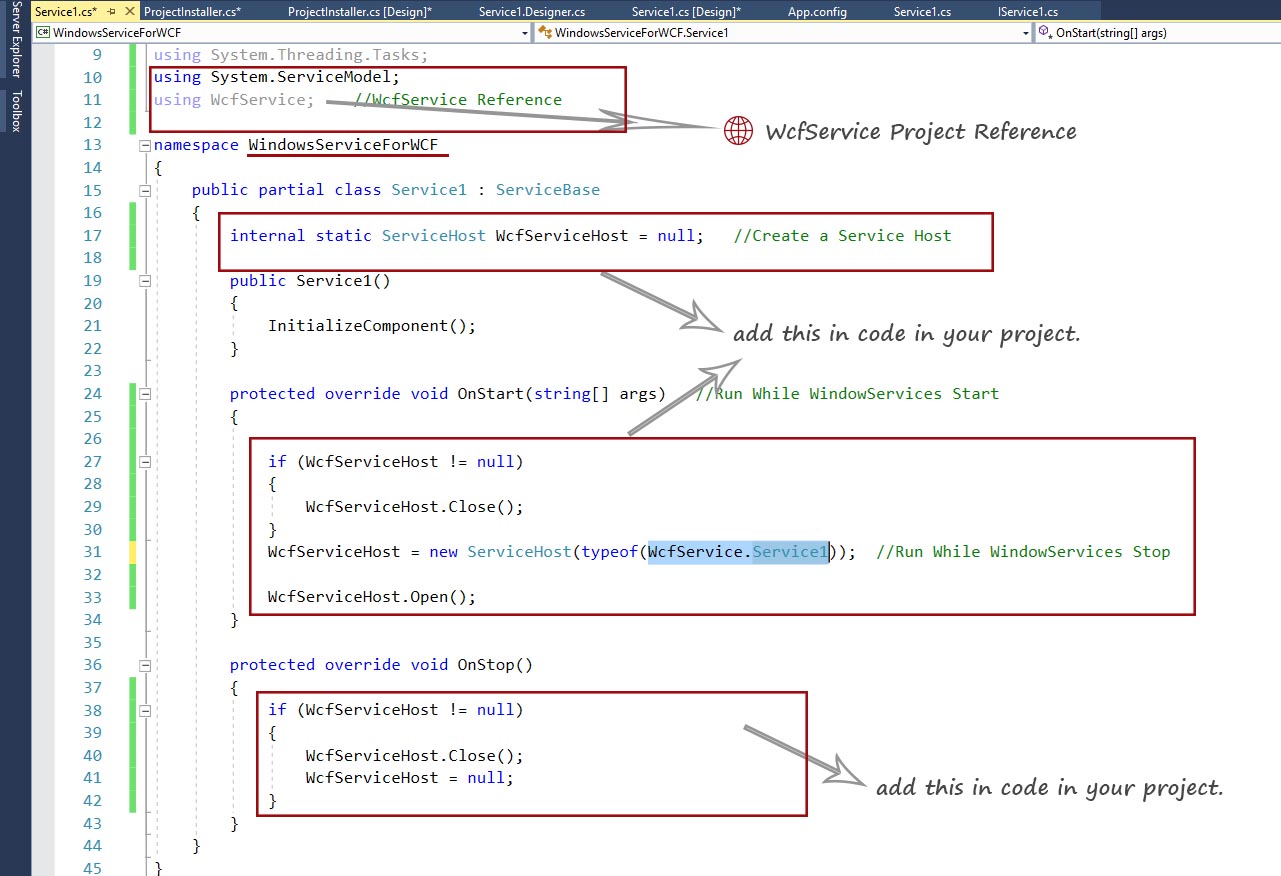
namespace WindowsServiceForWCF
{
    public partial class Service1 : ServiceBase
    {
        internal static ServiceHost WcfServiceHost = null;   //Create a Service Host

        public Service1()
        {
            InitializeComponent();
        }

        protected override void OnStart(string[] args)   //Run While WindowServices Start
        {

            if (WcfServiceHost != null)
            {
                WcfServiceHost.Close();
            }
            WcfServiceHost = new ServiceHost(typeof(WcfService.Service1));  //Run While WindowServices Stop

            WcfServiceHost.Open();
        }

        protected override void OnStop()
        {
            if (WcfServiceHost != null)
            {
                WcfServiceHost.Close();
                WcfServiceHost = null;
            }
        }
    }
}
Step 21: After this, we need copy App.config of WCF Service Library Project(WcfService project).
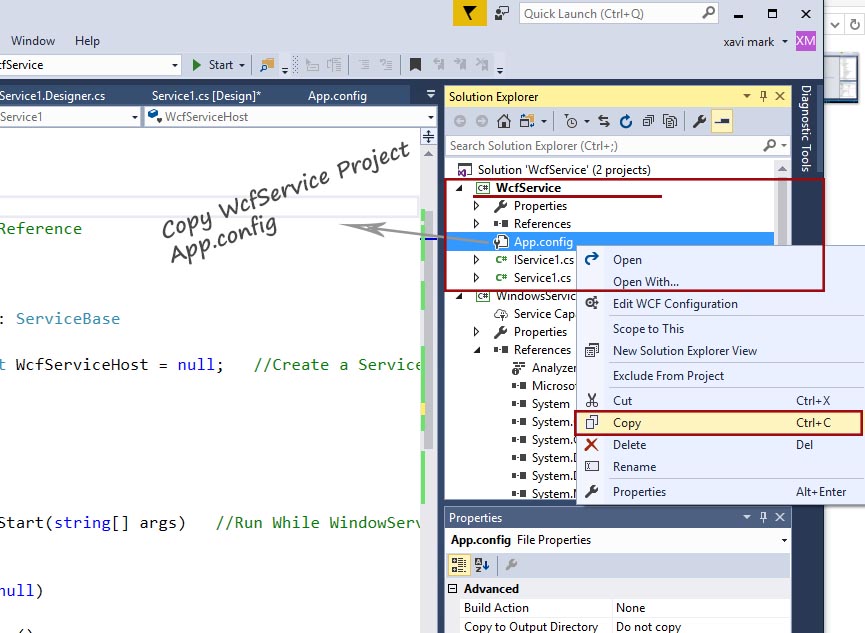
Step 22: And, Paste it here in Windows Service project(WindowsServiceForWCF project).
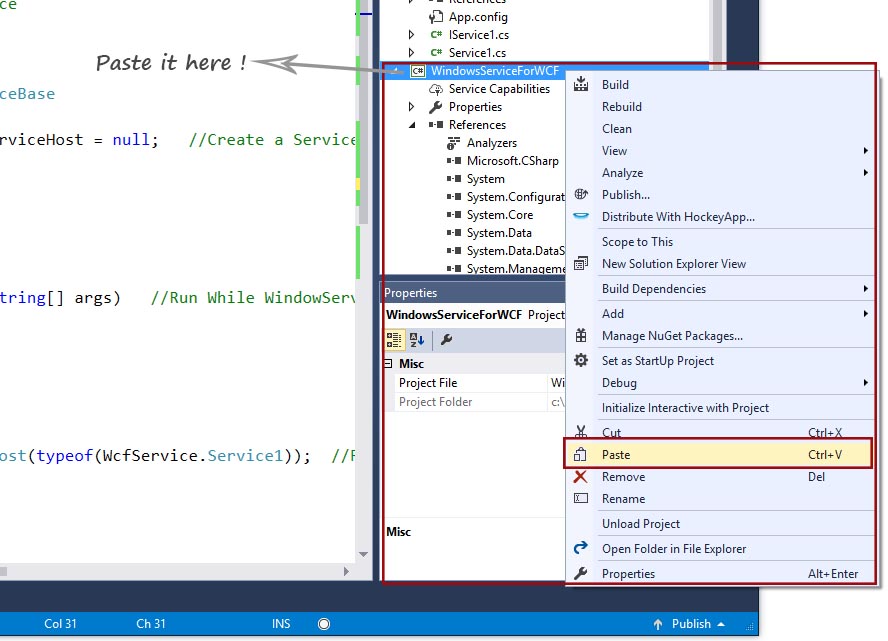
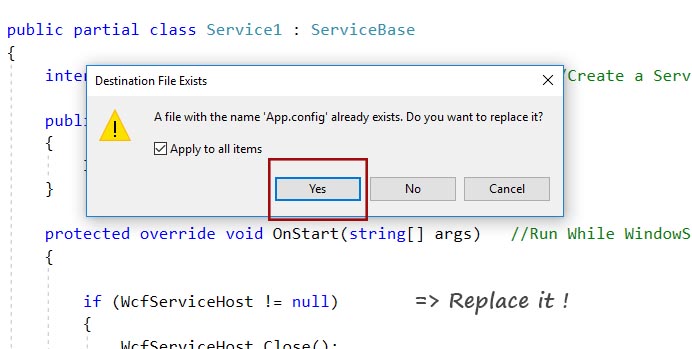
Step 23: Now a popup appear, click Yes to Replace it .
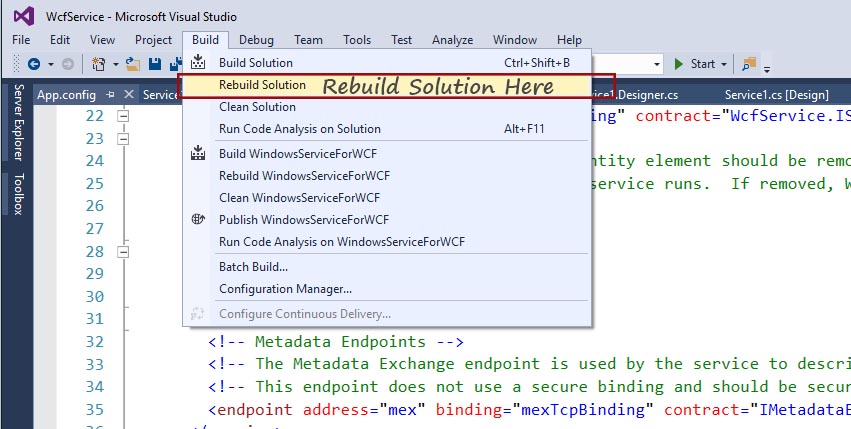
Step 24: Now Rebuild the Solution.
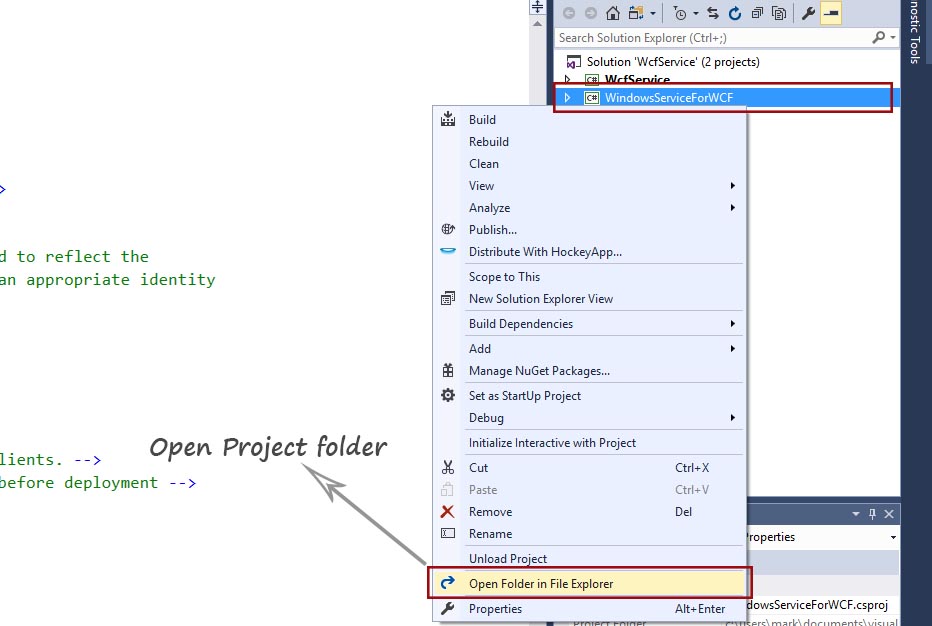
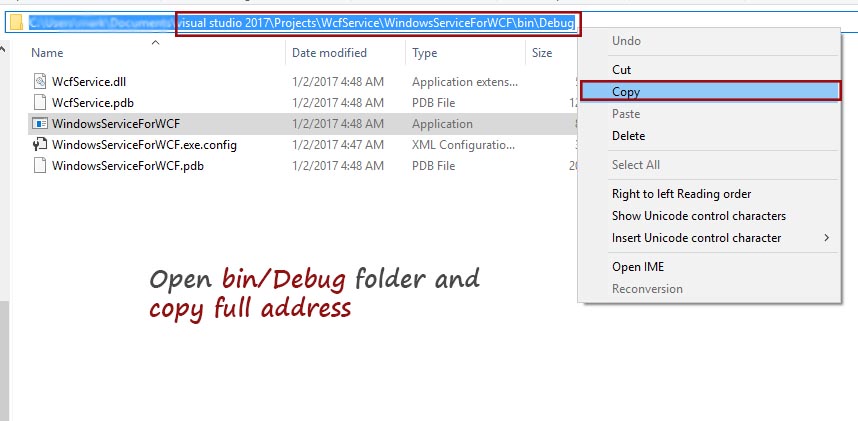
Step 25: Now, Open the folder of Windows Service project(WindowsServiceForWCF project).
Step 26: Copy the full address(Path) of Windows Service project(WindowsServiceForWCF project) Bin/debug folder.
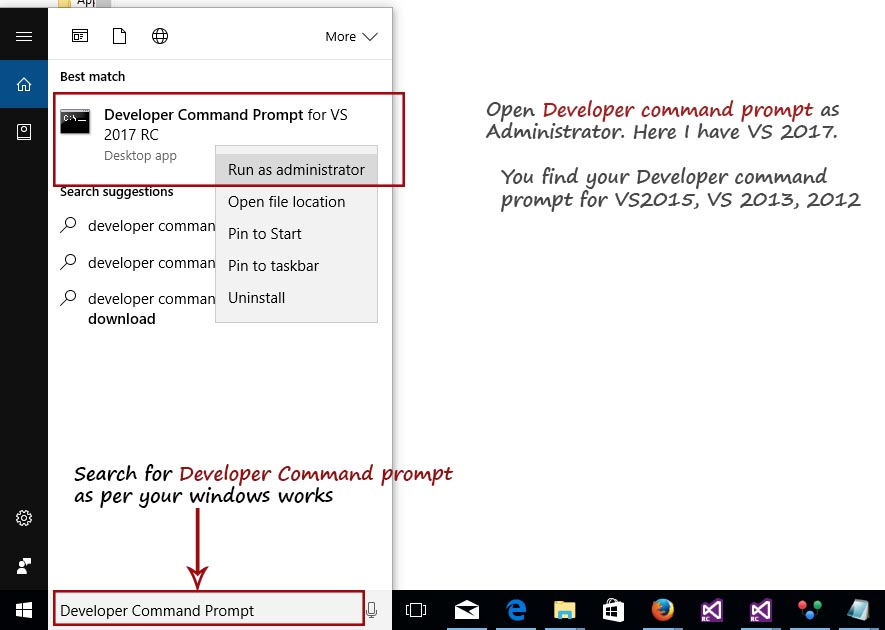
Step 27: Now, Find Developer Command Prompt for VS and Run as Administrator.
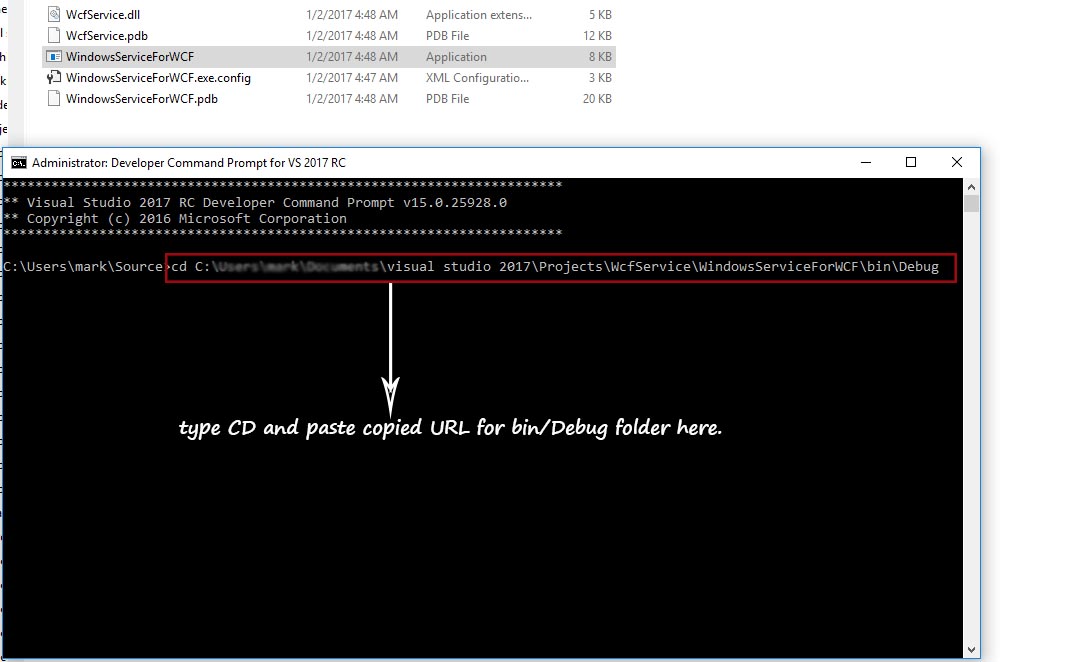
Step 28: A Developer Command Prompt appear on screen. Type " cd " and paste the address of Bin/debug folder you have copied in last steps.
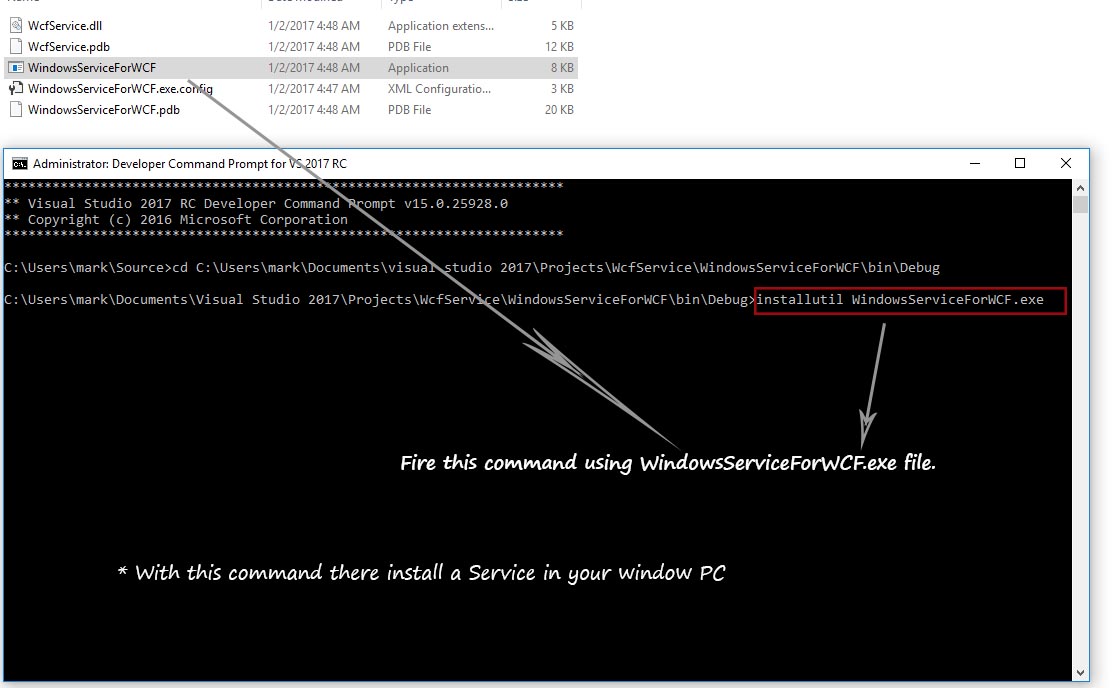
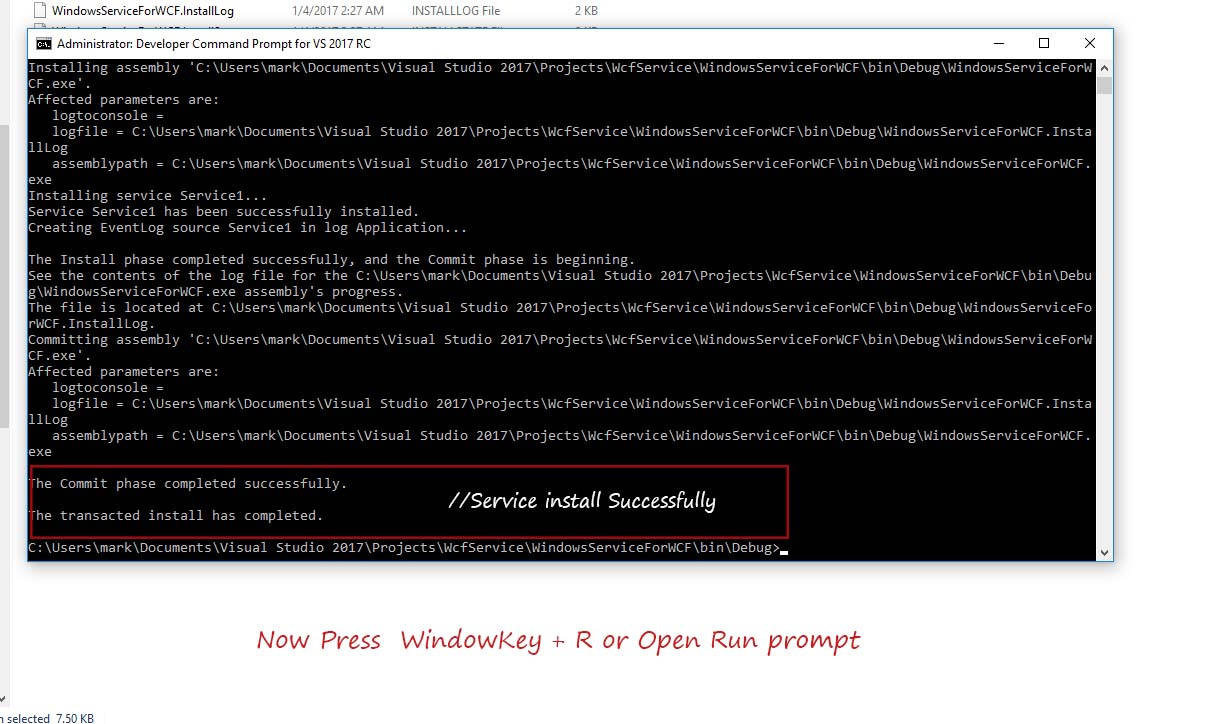
Step 29: Now at this Developer Command Prompt fire this command using Windows Service project(WindowsServiceForWCF project) exe file .
installutil WindowsServiceForWCF.exe
by this a windows service is install in your pc or where you want to install this service.
Note : if you facing any issue you can uninstall it using following command
installutil /u WindowsServiceForWCF.exe
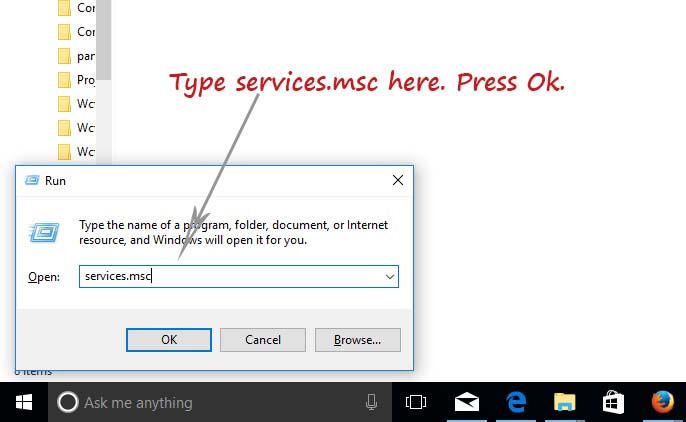
Step 30: Now, verify your service install successfully or not. And Press Windows Key + R
Step 31: After Pressing Windows Key + R, Run Prompt opened and type '' service.msc ".
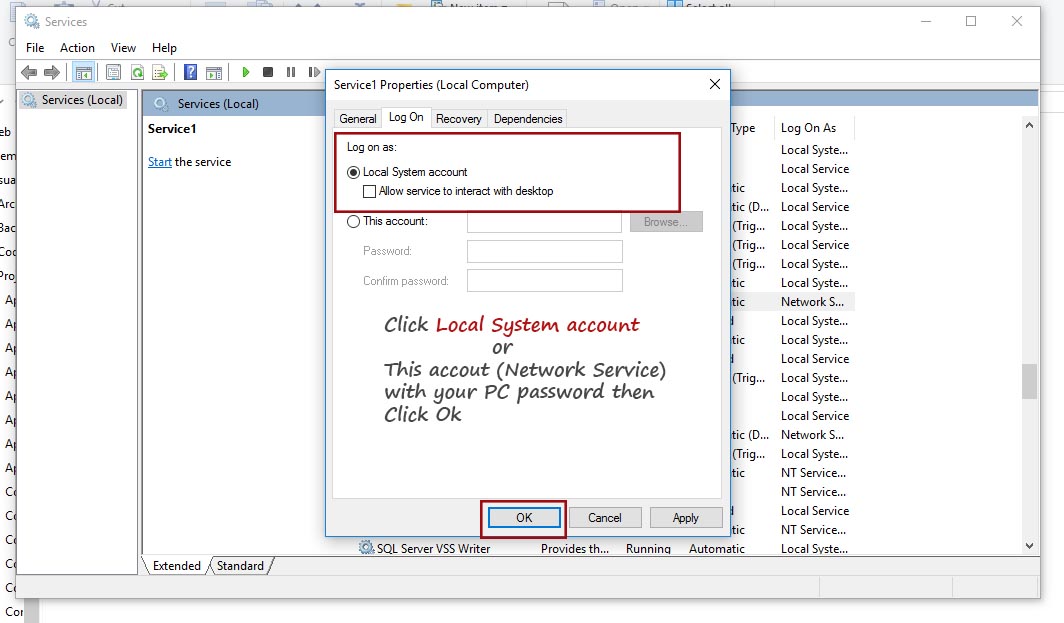
Step 32: Now, Find and select your installed Service in Windows Services and click on properties .

Step 33: In properties , go to Log On Tab and click on local system account. If you want to use Network Service as default, You need to provide your system credentials.
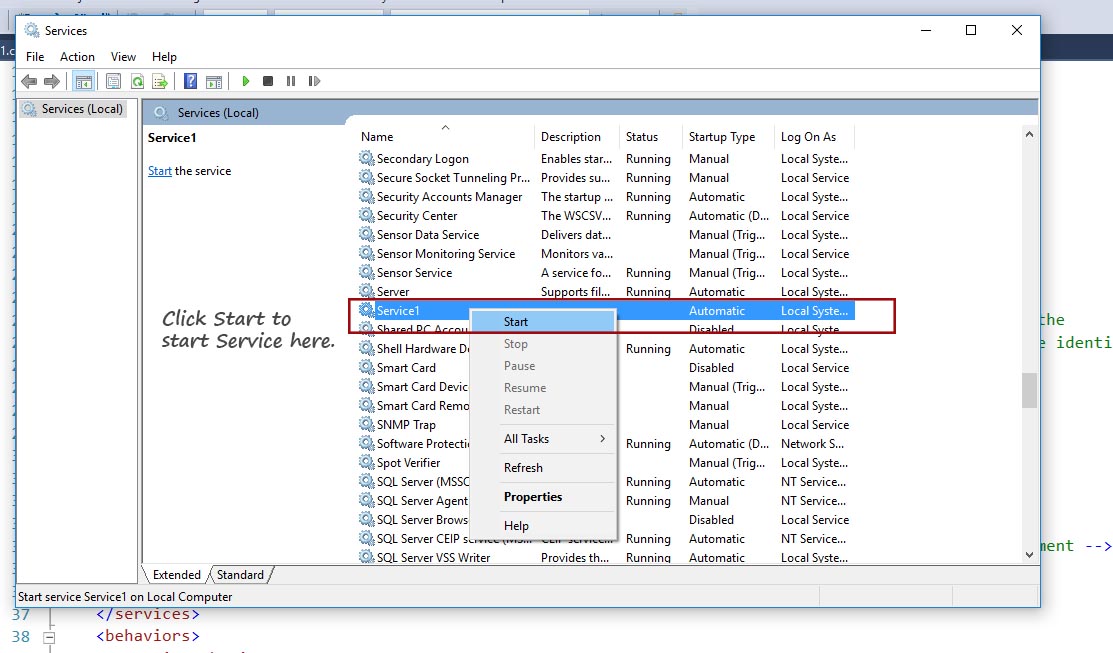
Step 34: Now start your windows service(Service1).
Step 35: Now it is time to Consuming the our WCF Service. So add a new project here.
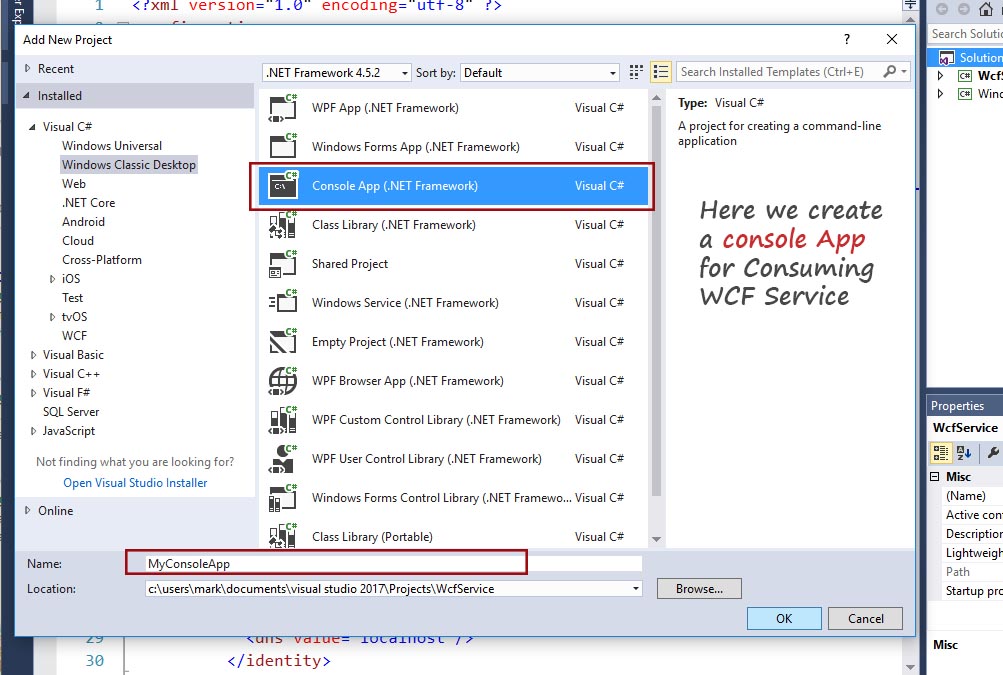
Step 36: I am going to add a new Console Project name as MyConsoleApp.
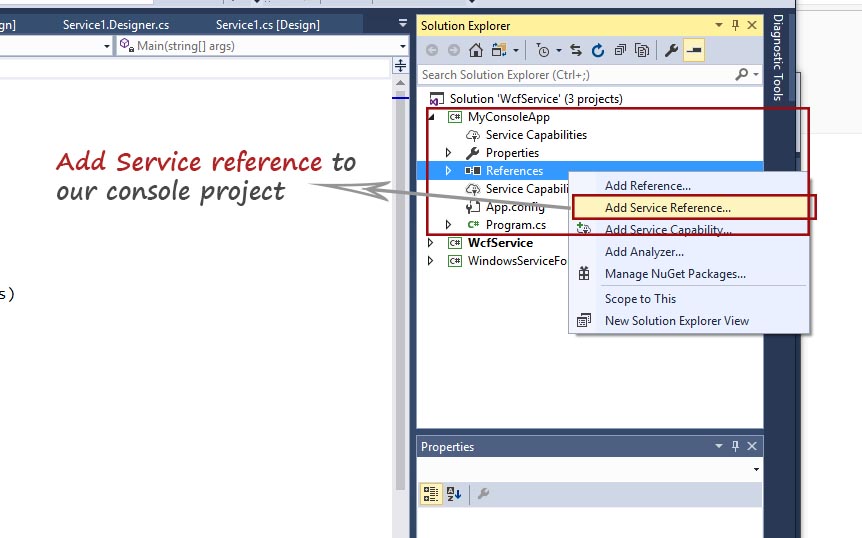
Step 37: Right click at MyConsoleApp's Reference and click at Add Service Reference.
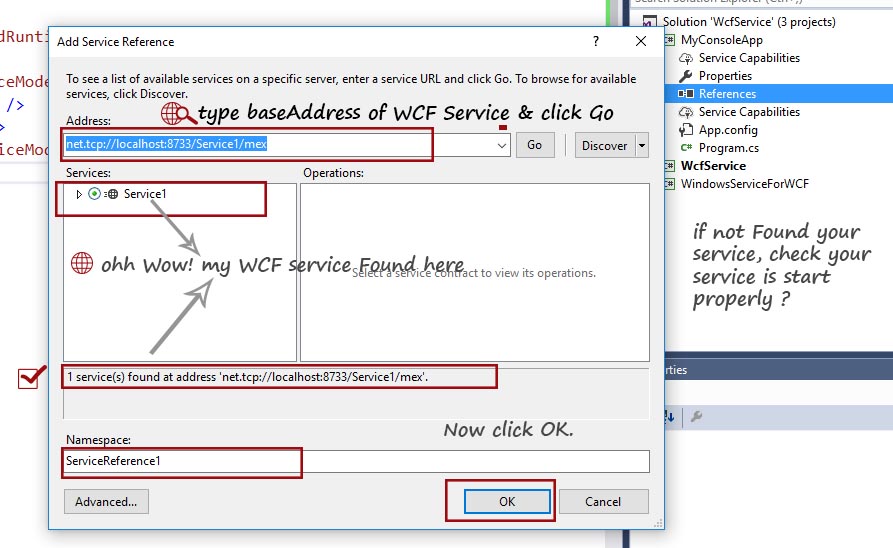
Step 38: In Add Service Reference, insert WCF Service baseAddress and click at Go. Here you Find a Your WCF Service which is hosted by Windows Service by you.
Step 39: Now Open MyConsole App's Program.cs file and add following code in it .
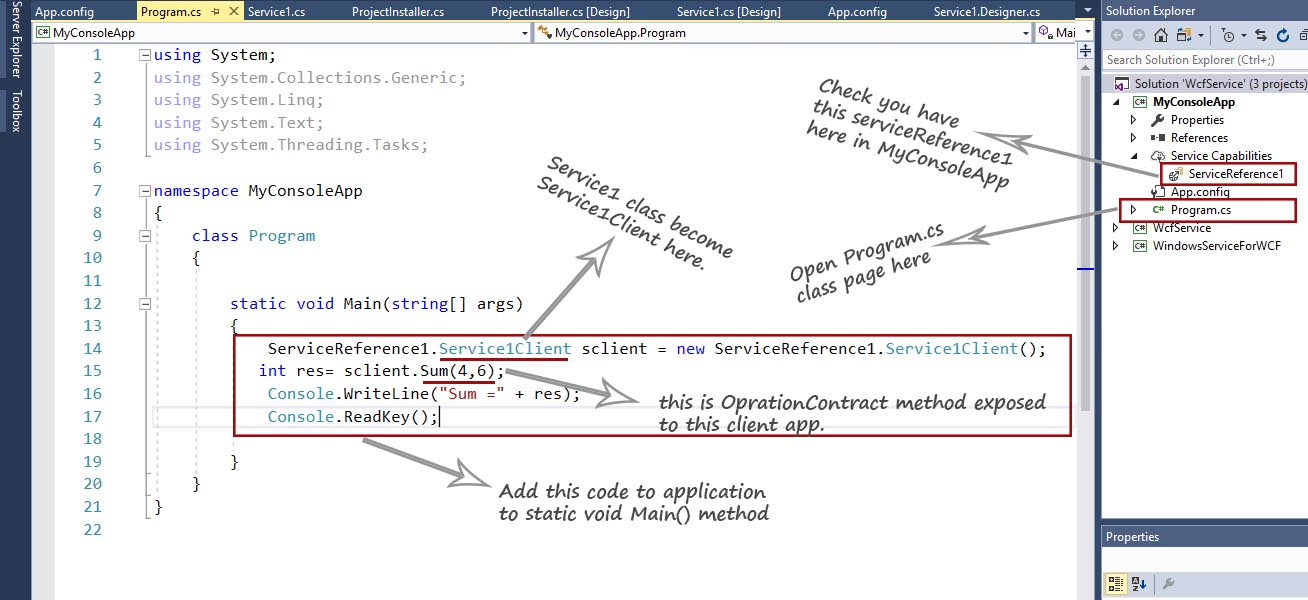
namespace MyConsoleApp
{
    class Program
    {

        static void Main(string[] args)
        {
            ServiceReference1.Service1Client sclient = new ServiceReference1.Service1Client();
           int res= sclient.Sum(4,6);
            Console.WriteLine("Sum =" + res);
            Console.ReadKey();

        }
    }
}
Step 40: Now build and Run MyConsole App and get result.

;