
Today, I discuss an IoT project, Before move further let's know about What is IoT. Internet of Things (IoT) technology facilitates us to easily connect over mechanical and digital sensor devices, collect analyze and manipulate data in real time. When we talk about IoT, The term "Arduino" often use in this ecosystem. Arduino boards(Open-source electronics platform based on easy-to-use hardware and software) are one of the most important objects that allow you to read inputs - light on a sensor, button press, or a wireless message - and turn it into an output - activating a motor, turning on an LED, publishing something online. Arduino is a piece of Hardware that runs on a simple software known as Arduino IDE. By this Arduino IDE, You can write and upload computer code to the Arduino board.
Arduino platform has become pretty popular with people for starting out the electronics modules and for a good reason. Like other most programmable circuit boards. Arduino seems not to need any specific skill set in order to upload new code. Additionally, Arduino IDE uses a simplified version of C++ for making Arduino sketches that making it easier to learn to program.
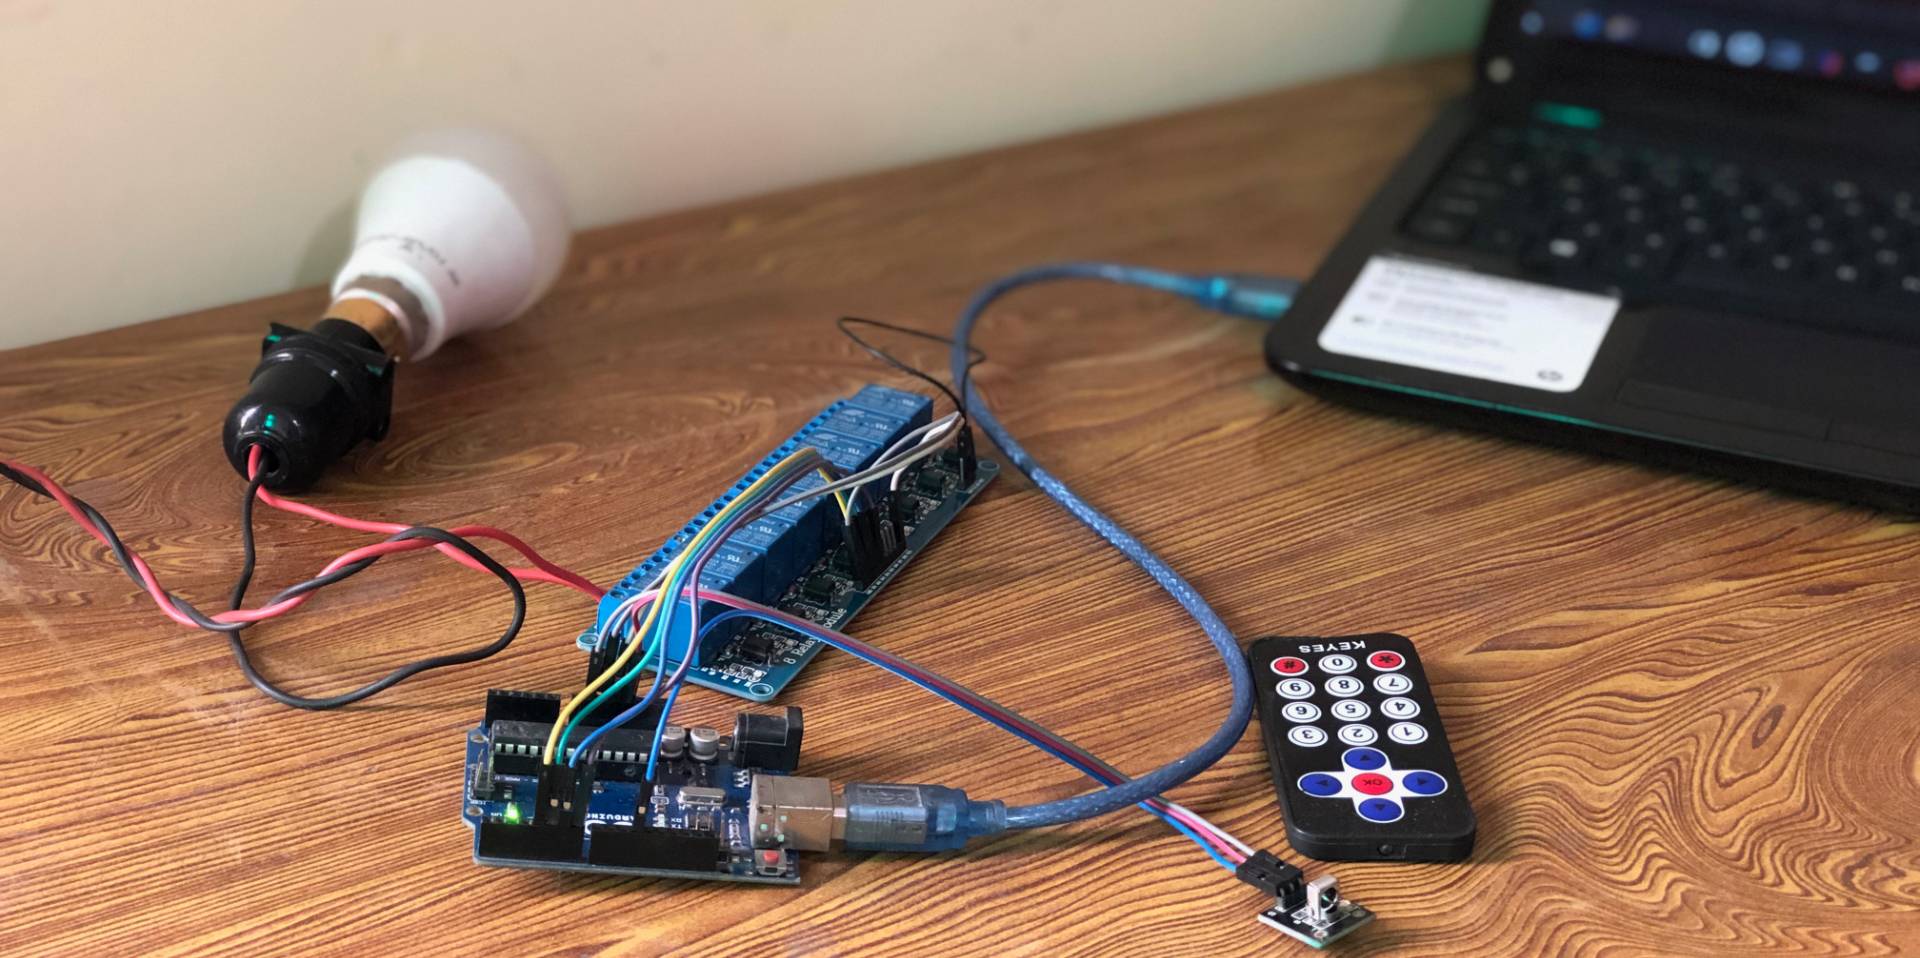
Now come at today's topic Home Automation, Home automation gives you access to control Home appliances (turning them on or off ) in your home from a remote control or any handheld device. It includes everyday tasks like turning off lights, locking doors, controlling the temperature of the air condition system and many more. Well, today we try to cover a task (turning off lights) using Arduino with the help of a remote. The remote control is used to control (simply ON and OFF) several appliances or devices, thus accomplishing a simple home automation system.
Things used in this project:
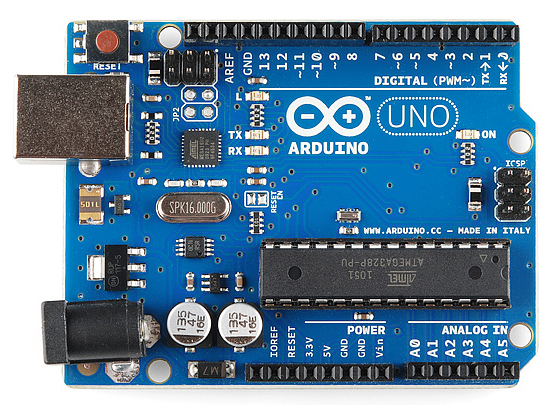
Arduino UNO
IR Infrared Remote Control Kit
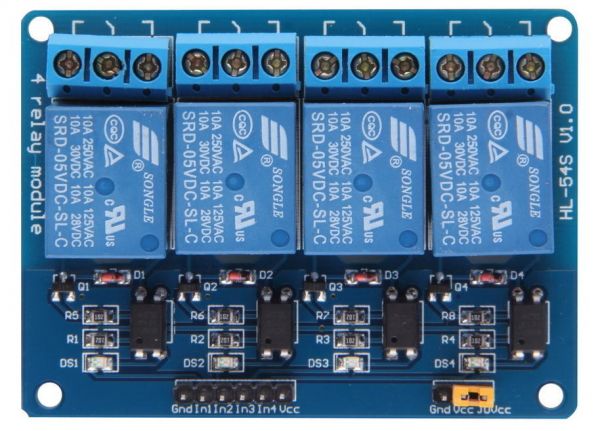
4 Channel 5V Relay Module
Jumper wires (generic)
Project & Module Descriptions :
There are many ways to implement a remote control Home Automation system. Here, This project is a quite elementary and simple application of Home automation for educational purposes. This project is designed using Arduino Uno as the main processing block for all manipulation and decision making.
Arduino UNO:
The Uno is one of the more popular boards in the Arduino family and a great choice for newcomers. We have already talked about it in the above of the blog.
IR Infrared Remote Control Kit:
This kit includes an IR remote control, an infrared receiver and some Jumper wires. Using this kit, you can control your Arduino with the included remote control and use the receiver.
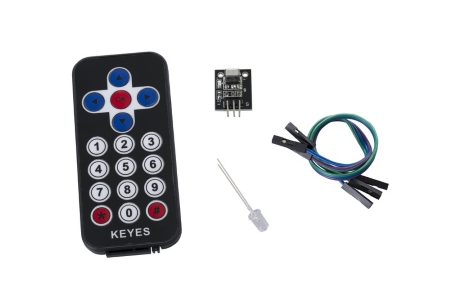
Pin 1 left pin = ground
Pin 2 middle pin = 5v
Pin 3 right pin = signal out to arduino pin 11
4 Channel 5V Relay Module:
This 4 Channel 5V Relay interface module, used for controlling various appliances, and types of equipment with high current(up to 250V). It can be controlled directly by a microcontroller. In our case, we'll attempt to control it through Arduino UNO.
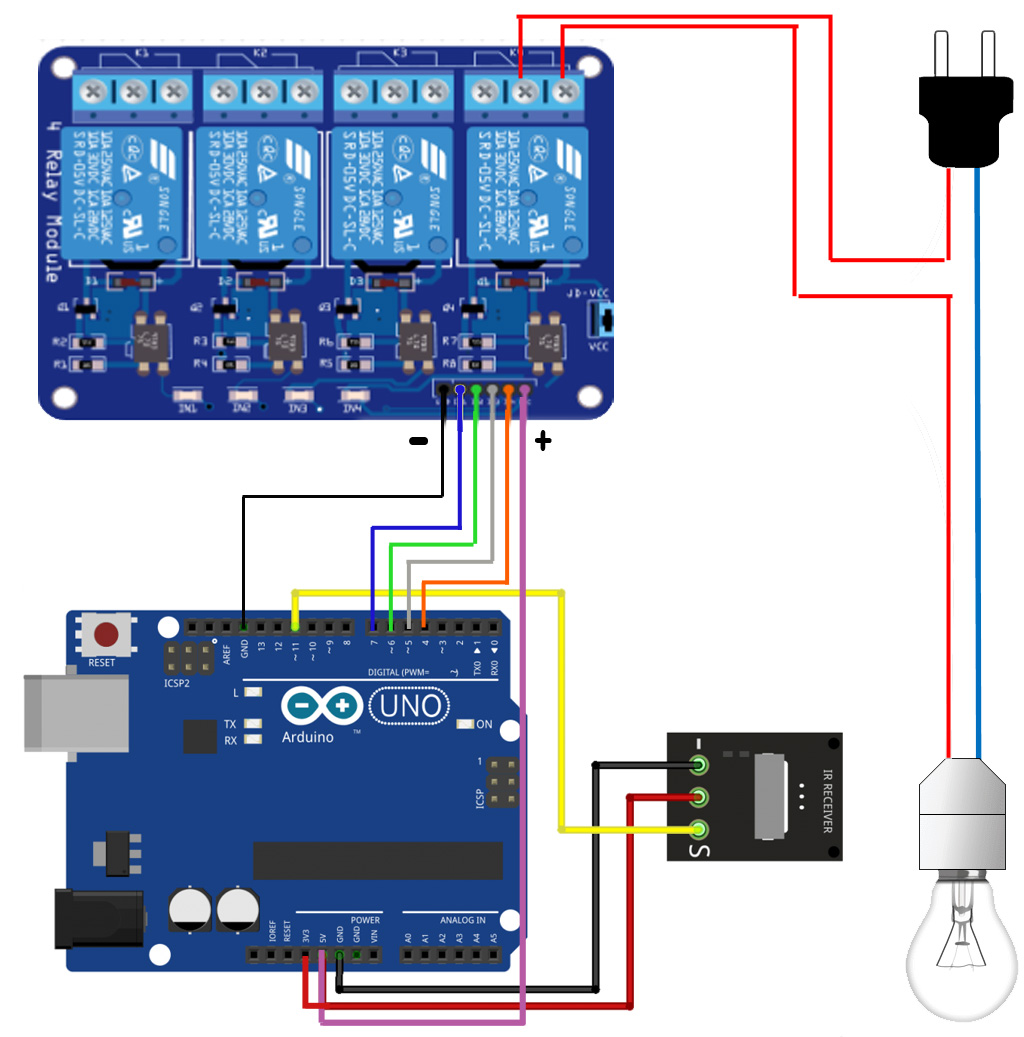
Circuit Implementation:
|
Arduino Pin |
Relay Module |
|
4 |
IN1( Input 1 ) |
|
5 |
IN2( Input 2 ) |
|
6 |
IN3( Input 3 ) |
|
7 |
IN4( Input 4 ) |
|
5V |
Vcc |
|
Gnd |
Gn |
|
IR Infrared Remote Control Kit |
|
|
3.3v |
VCC |
|
Gnd |
Gnd |
|
11 |
S |
So, let’s get started!
Step 1: Launch Arduino IDE.
If you don't have Arduino IDE, you can Get it from here.
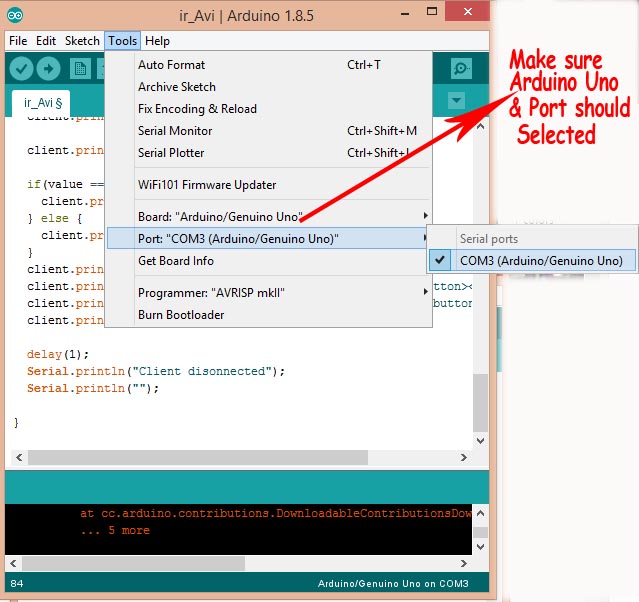
Step 2: Make sure Arduino is Connect or not (verify Port no and Board Type in Tools menu).
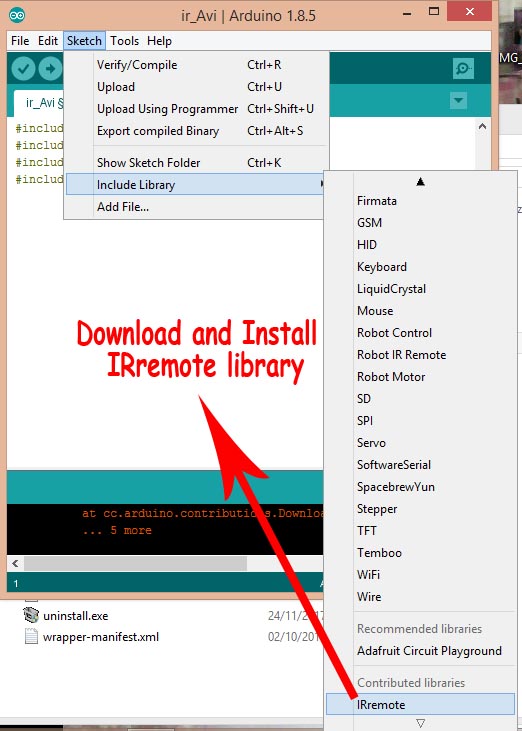
Step 3: Now, Make sure you included the IRremote Library in Arduino IDE or not. If you will not find the IRremote library like the below image, You need to download it from here and install this library like this link.
Step 4: Paste below code(sketch) in Arduino IDE. If you made any variations in pin selection in the current physical circuit, you should modify the code as well for better output.
#include "IRremote.h"
int receiver = 11; // Signal Pin of IR receiver to Arduino Digital Pin 11
boolean d1;
boolean d2;
boolean d3;
boolean d4;
/*-----( Declare objects )-----*/
IRrecv irrecv(receiver);     // create instance of 'irrecv'
decode_results results;      // create instance of 'decode_results'

void setup()   /*----( SETUP: RUNS ONCE )----*/
{
  Serial.begin(9600);
  Serial.println("IR Receiver Button Decode");
  irrecv.enableIRIn(); // Start the receiver
  pinMode(4, OUTPUT);
  pinMode(5, OUTPUT);
  pinMode(6, OUTPUT);
  pinMode(7, OUTPUT);
  digitalWrite(4, HIGH);
  digitalWrite(5, HIGH);
  digitalWrite(6, HIGH);
  digitalWrite(7, HIGH);
  d1 = false;
  d2 = false;
  d3 = false;
  d4 = false;

}/*--(end setup )---*/

void loop()   /*----( LOOP: RUNS CONSTANTLY )----*/
{
  if (irrecv.decode(&results)) // have we received an IR signal?

  {
    translateIR();
    irrecv.resume(); // receive the next value
  }
}/* --(end main loop )-- */

/*-----( Function )-----*/
void translateIR() // takes action based on IR code received

// describing Remote IR codes

{
  switch (results.value)
  {
    case 0xFF629D: Serial.println(" FORWARD"); break;
    case 0xFF22DD: Serial.println(" LEFT");    break;
    case 0xFF02FD: Serial.println(" -OK-");    break;
    case 0xFFC23D: Serial.println(" RIGHT");   break;
    case 0xFFA857: Serial.println(" REVERSE"); break;
    case 0xFF6897: {
        Serial.println(" 1");
        if (d1 == false)
        {
          digitalWrite(4, LOW);
          d1 = true;
        }
        else
        {
          digitalWrite(4, HIGH);
          d1 = false;
        }
        break;
      }


    case 0xFF9867:
      {
        Serial.println(" 2");
        if (d2 == false)
        {
          digitalWrite(5, LOW);
          d2 = true;
        }
        else
        {
          digitalWrite(5, HIGH);
          d2 = false;
        }
        break;
      }

    case 0xFFB04F:
  {
        Serial.println(" 3");
        if (d3 == false)
        {
          digitalWrite(6, LOW);
          d3 = true;
        }
        else
        {
          digitalWrite(6, HIGH);
          d3 = false;
        }
        break;
      }
    case 0xFF30CF: {
        Serial.println(" 4");
        if (d4 == false)
        {
          digitalWrite(7, LOW);
          d4 = true;
        }
        else
        {
          digitalWrite(7, HIGH);
          d4 = false;
        }
        break;
      }
    case 0xFF18E7: Serial.println(" 5");    break;
    case 0xFF7A85: Serial.println(" 6");    break;
    case 0xFF10EF: Serial.println(" 7");    break;
    case 0xFF38C7: Serial.println(" 8");    break;
    case 0xFF5AA5: Serial.println(" 9");    break;
    case 0xFF42BD: Serial.println(" *");    break;
    case 0xFF4AB5: Serial.println(" 0");    break;
    case 0xFF52AD: Serial.println(" #");    break;
    case 0xFFFFFFFF: Serial.println(" REPEAT"); break;

    default:
      Serial.println(" other button   ");

  }// End Case

  delay(500); // Do not get immediate repeat

}
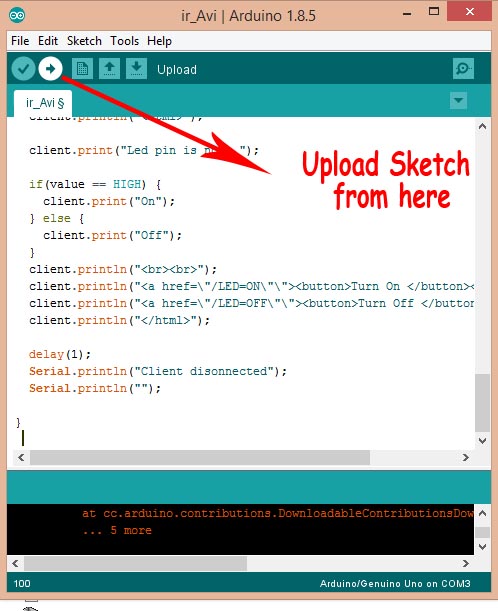
Step 5: Now press the 'Upload' button. After sketch Compilation, there should some LEDs flashing on your Arduino, while you get 'Done Uploading' message in the status bar.
Step 6: Here we go, Now press the remote key for getting a relay active which makes light up you blub.
Now, If you are facing any error or connection issue, please let me know in the comment section, I'll try to help you out and make sure your project produces the desired result.
Thanks for reading.
;